• Portfolio
  • Blog
  • Contact
  • River City Congress

James Sanny

  • Portfolio
  • Blog
  • Contact
  • River City Congress

Support Your Local Nobody

IMG_8377sm.jpg

I consider myself a nobody in this industry. From what I can tell, I haven’t really been on anyone’s radar. So, as 2018 came to a close, I took a chance and decided to reach out to some publications that I admire (perhaps you saw my letter to Super Street?). Since I started shooting more seriously, especially with vehicles, it's been a dream of mine to be a part of that world. There's just something about seeing your work in print, and watching other people enjoy it and go out of their way to look at it again and again, that brings absolute joy to my heart. This was my goal and I'd hoped I'd made enough progress to see it come to fruition in 2019.

Street Trucks responded to my inquiry almost immediately, letting me know they were very interested in featuring Brandon's truck in an upcoming mini truck issue. Sharing the exciting news with Brandon, we set a date to create some fresh new content and so we did. At the time, I was just thrilled to be a part of such a fantastic and established publication. Little did I know that my first time being involved in their publication would yield not only a multi-page feature but also the cover! 

This is a feeling I've never known in photography. A 20 year old publication, with a well established following, so happy with the work I provided for them that they're willing to bank their monthly sales and reputation on it. I had no words. "Thank you," didn't seem sufficient. "I can't believe this," felt disrespectful. It's one of the most humbling experiences of my life - and I'm so incredibly excited to share it with my friends and family. So, for those who haven’t yet seen it, here’s the June 2019 cover of Street Trucks!

View fullsize wichita-automotive-photographer-car-magazine-1.jpg
View fullsize wichita-automotive-photographer-car-magazine-10.jpg
View fullsize wichita-automotive-photographer-car-magazine-4.jpg
View fullsize wichita-automotive-photographer-car-magazine-7.jpg
View fullsize wichita-automotive-photographer-car-magazine-12.jpg
View fullsize wichita-automotive-photographer-car-magazine-3.jpg
View fullsize wichita-automotive-photographer-car-magazine-9.jpg
View fullsize wichita-automotive-photographer-car-magazine-14.jpg
View fullsize wichita-automotive-photographer-car-magazine-6.jpg
View fullsize wichita-automotive-photographer-car-magazine-16.jpg
View fullsize wichita-automotive-photographer-car-magazine-13.jpg
View fullsize wichita-automotive-photographer-car-magazine-8.jpg
View fullsize wichita-automotive-photographer-car-magazine-11.jpg
View fullsize wichita-automotive-photographer-car-magazine-17.jpg
View fullsize wichita-automotive-photographer-car-magazine-18.jpg
View fullsize wichita-automotive-photographer-car-magazine-17.jpg
tags: Chevrolet, Wichita, Canon, Sony, Publication
categories: News
Thursday 04.18.19
Posted by James Sanny
 

How Do You Take Rolling Shots?

Let's get straight to the point here - vehicles were made to move. The most dynamic way to show off a vehicle is when it's doing what it's meant to do, where it's meant to do it. So this is why everyone loves seeing images of cars in motion. It's why car manufacturers use motion shots to sell their products and it's why enthusiasts are often times looking specifically to get shots of their cars racing down the road. Motion is to cars what peanut butter is to jelly. Not a PB&J fan? How about avocado to toast? Still no? Let's move on..

When it comes time to capture vehicles in motion, there are several options available to photographers. The rig shot, the virtual rig shot, the tracking shot, and the rolling shot. There's a lot of information out there about all of these, so I won't bore you with the details on each one. Instead, we're going to focus on the go-to for all up-and-coming automotive photographers- the rolling shot. It's relatively easy, doesn't require extra equipment, can be captured in camera with minimal post work involved, and can be a stunning addition to your portfolio.

View fullsize motion-rig-shot.jpg
View fullsize motion-tracking-shot.jpg
View fullsize motion-rolling-shot.jpg

What exactly is a rolling shot? A rolling shot is a photograph of a vehicle while it is in motion. The wheels are spinning, the background is streaking by, and the subject vehicle is sharp. That's the goal, anyway. Many folks settle for good motion and have slightly jittery looking cars in their images. (Cue the excuses about it being "pretty good considering it was taken at 1/5th of a second." That's cool. If your goal is "pretty good considering," we're done here. You've already graduated from this free tutorial and you're too lit for this fam. Gang gang.)

How can I capture motion and keep my car sharp? You've got several options here: 

  1. Get yourself a lens with image stabilization

  2. Use smooth roads and a smooth riding camera car

  3. Drive slower to reduce bounce and wind vibration

  4. Shoot in enclosed or tight locations (the closer your subject is to objects it's passing by, the more obvious the motion will be - which explains why road signs, weeds along the shoulder, and other close objects are blurry but distant trees, mountains, clouds, etc. are usually fairly sharp)

  5. Shoot faster (it sounds counter productive but, if you just don't have steady hands or a smooth road, you can combine shooting faster with shooting in a tighter location to help get as much motion as possible)

changemymind.jpg

Finally, what are the "best settings" for taking rolling shots? This is probably the most common question in every automotive photography group and forum on the internet. It's asked daily and every answer varies to some degree. So.. Here's the honest to God truth, based on my own personal experience:

  1. Use Shutter Priority mode. Your entire goal is to capture motion and keep your car sharp. The only two things you should be dealing with when trying to catch that shot are whether or not you're catching the desired amount of motion and whether or not your car is staying sharp. Don't let people shame you into thinking you have to use Manual Mode to achieve good motion shots of cars. The only thing Manual Mode will do is require you to constantly adjust your settings so that your exposure stays consistent.. and those settings that you're dealing with are automatically made by the camera when using Shutter Priority mode, so why burden yourself with that task?

    1. Argument: Manual Mode gives you full control because the camera isn't always capable of making the right decision when shooting. News flash.. The camera is smarter than you are. And if you're using the built in light meter to balance out your exposure, you aren't making a different choice on exposure than it would have. In fact, if your camera isn't capable of automatically choosing the correct aperture to expose your image properly, it's likely because you aren't using the correct metering mode. (Switch to Spot Metering so that your camera is using the area where you're focusing to determine your exposure. After all - you're focusing on your subject, so wouldn't you want it to be properly exposed?)

  2. There is no perfect shutter speed setting because it all depends on your lighting, location, road smoothness, lens stabilization and your own ability. A common tip I've seen though is to use half the speed that you're traveling - so if you're driving 60mph and shooting, try for a shutter speed of 1/30th of a second. Whatever speed you go with, be sure to take some shots at various shutter speeds so that you definitely get something sharp and usable. Personally, I start around 1/80th and then work my way down to get more motion.

  3. Brace yourself. Wrap that camera strap around your wrist, or keep it around your neck, brace your arms firmly against the window or side of the vehicle you’re riding in, and keep your arms as steady as possible. The last thing you want is to turn your clicky fun box into a smart bomb.

  4. Set your drive mode to continuous. Don’t just snap 1 photo at a time or you’ll risk shooting at the exact right moment to capture great blur and a sharp subject. Hold that shutter button down to capture a burst of several images at a time, increasing your chances of getting “the shot.”

  5. Focal length? A wide angle lens is preferable in two lane situations but, if you've got access to a 3/4/5 lane highway, feel free to play with a telephoto lens. The longer focal length you use, the more noticeable motion you'll catch in the background elements of your image. That said, you're also risking more noticeable motion on the car, so experiment with it.

  6. Avoid highways with ugly shopping centers, power lines and road signs in the background. Shots like that can be tasteful if composed well and timed right but, 9 times out of 10, they aren't. Nobody likes photos of themselves with trees or poles sticking out of their head. The same rule applies for vehicles. If the only place you have access to is full of light poles, power lines, signs, etc., try to frame the vehicle between these. Composition doesn't lose importance just because the vehicle is in motion.

Again, the goal of motion shots for all vehicles is simple: Keep the subject sharp but show us good motion around it. This blog entry is just a collection of my own experiences and suggestions for those looking to try and do the same thing. If you love busy backgrounds or your ego won't let that dial on your camera leave Manual, you do you.. but if you're actually looking to try something different and make your job a little bit easier, consider some of these tips. They've certainly helped me improve and maybe they can do the same for you.

Monday 03.25.19
Posted by James Sanny
 

Color Grading

_DSC1081sm.jpg

Way back when I started this journey into photography, I was under the impression that the goal was to take good pictures. Then I started finding all these inspirational sayings online about how a real photographer doesn't "take a picture," they "make a picture." But what does that mean? To be honest, even to this day, I haven't a clue.

What I have learned over the years is that some people shoot to nail everything in camera so that the image is complete and ready once the button has been pressed. Others, seeking to achieve more without big budgets and a crew, turned to programs like Photoshop to get the finished product they desired. Not being in the habit of socializing with complete strangers, having experienced the earlier, more elitist personalities of Wichita's photography scene, and having very little disposable income, it looked like the post production route was a good fit for me.

View fullsize _DSC1081smB.jpg
View fullsize _DSC1081sm.jpg

Having spent years watching tutorials, reading books, and even talking with others who shared my passion online, I felt like I was finally beginning to master my look and ability behind the lens. Then, about a year ago, I found out that color grading and toning was a thing. I mean, I wasn't a total stranger to this practice, as I did some in post when handling video for Cinemauto.. but never had I done anything like this to my photographs. If I wanted to change colors in an image, I typically adjusted my white balance, applied split toning, or used photo filters and masks in post. In short, I didn't have a clue.

So, these days, I take the time to play around with gradient maps and color lookup tables when I'm editing. While I don't love a lot of the vintage, faded, retro effects that feel like filters and presets (because I know those date your images), there's just something about coloring a project to achieve a feel or look. In the case of these images, taken during a recent AutoICT meetup, I wanted a look that felt like a long summer evening. Warm, dry, dirty and endless, like a desert. (I'm a pretty big fan of Vince Gilligan's work with Breaking Bad - specifically the coloring and photography.)

View fullsize _DSC1077sm.jpg
View fullsize _DSC1102sm.jpg
View fullsize _DSC1108sm.jpg
View fullsize _DSC1094sm.jpg
View fullsize _DSC1097sm.jpg
View fullsize DSC09649sm.jpg
View fullsize DSC09653sm.jpg
View fullsize DSC09681sm.jpg
View fullsize DSC09687sm.jpg
View fullsize DSC09642sm.jpg

Gear: Sony A7RIII, A6500, Sony 24-105 G, Sony 18-105 G, Tiffen CPL, Manfrotto Tripod

Post Processing: Adobe Camera Raw & Adobe Photoshop

tags: Sony, Chevrolet, Wichita, AutoICT
categories: Events
Tuesday 03.12.19
Posted by James Sanny
 

RADwood Austin 2019

Most of us can't even remember what we had for breakfast last week but, if you ask someone to describe a day during the most influential decade of their youth, they still remember Saturday mornings as a kid. Closing my eyes right now, I see the morning sun, dancing through the trees as it passed through the front screen door and onto the worn, brown, living room carpet. I remember how mushy my Captain Crunch had already become just three bites in, which only made it easier to hear all about "the world's most fearsome, fighting teens."

While many might disagree, especially those who experienced adolescence in the 80's and 90's, there was no secret sauce that made these two particular decades any better than those that surround them. Or is there..? To be honest, nothing compares to a trip down memory lane. After all, nostalgia is the go-to Instagram filter of our memories.. and who doesn't want to see those beautiful days again?

This past weekend I had the opportunity to check out RADwood in Austin, Texas. If you haven't heard of it, you will. RADwood is the celebration of 80's and 90's culture, focused mostly around the cars and fashion of the era. In that spirit, several RADwood shows exist across the globe, all featuring cars that were built during this time period. Some of them are the cars you remember, like the Volkswagen GTI, the Chevrolet Corvette and the Ferrari F40. Other cars present at the show seem to exist as cult classics, lesser known to the average Joe but equally impressive in their respective circles.

As a child of the 80's myself, it's easy to understand how a show like this probably made me feel. It was like hopping into a time machine and traveling back to a place where magic still existed and the future was unclear- and, of course, Doc, Marty and the Delorean(s) were there. Spectators are, after all, encouraged to participate in rad culture however they possibly can. Whether that's neon windbreakers, dressing as an 80's/90's pop culture icon, or bringing out a rad ride, the choice is entirely up to you. 

And that's really what cultural movements like this are all about, right? It's not about a political stance. (It's actually not about stance at all- did you even look at the photos?). This subculture, dressed like a box of highlighters and rocking out to synthesizers and hair bands, is focused on celebrating two of the greatest decades the world will ever know. Then again, I might be biased.

View fullsize RADwood (4 of 68).jpg
View fullsize RADwood (6 of 68).jpg
View fullsize RADwood (8 of 68).jpg
View fullsize RADwood (29 of 68).jpg
View fullsize RADwood (47 of 68).jpg
View fullsize RADwood (43 of 68).jpg
View fullsize RADwood (15 of 68).jpg
View fullsize RADwood (14 of 68).jpg
View fullsize RADwood (52 of 68).jpg
View fullsize RADwood (19 of 68).jpg
View fullsize RADwood (11 of 68).jpg
View fullsize RADwood (0 of 68).jpg
View fullsize RADwood (20 of 68).jpg
View fullsize RADwood (13 of 68).jpg
View fullsize RADwood (18 of 68).jpg
View fullsize RADwood (17 of 68).jpg
View fullsize RADwood (26 of 68).jpg
View fullsize RADwood (25 of 68).jpg
View fullsize RADwood (30 of 68).jpg
View fullsize RADwood (68 of 68).jpg
View fullsize RADwood (32 of 68).jpg
View fullsize RADwood (46 of 68).jpg
View fullsize RADwood (50 of 68).jpg
View fullsize RADwood (44 of 68).jpg
View fullsize RADwood (58 of 68).jpg
View fullsize RADwood (33 of 68).jpg
View fullsize RADwood (51 of 68).jpg
View fullsize RADwood (35 of 68).jpg
View fullsize RADwood (36 of 68).jpg
View fullsize RADwood (45 of 68).jpg
View fullsize RADwood (62 of 68).jpg
View fullsize RADwood (65 of 68).jpg

View the full gallery from RADwood Austin 2019.


Gear: Sony A7RIII, Sigma MC-11, Canon 24-70 2.8L, Tiffen CPL, Manfrotto Tripod

Post Processing: Adobe Camera Raw, Adobe Lightroom & Adobe Photoshop

tags: Sony, Texas, 80's, 90's
categories: Events
Thursday 02.28.19
Posted by James Sanny
 

Acura Integra Type R (DC5R)

Every once in a while I find myself in a creative slump when it comes to shooting. Sometimes it's because I've hit a dry spell and I'm not shooting anything. Other times it's because I'm shooting the same stuff, over and over again. Regardless of the reason, when these feelings arise I will typically reach out to friends on social media and ask for something to shoot. (For free!? Yes. Especially if I'm playing with ideas and new gear.)

Having recently run across the for sale ad of a local guy's Type R Integra, I figured this would be a good opportunity to break out of the winter slump and try more creative editing and lighting. He's good friends with my buddy that owns the super clean Honda Civic I shot a few weeks back, so we set up a time to get the car out and capture a few images before it found its new home. This was a benefit to us both, as he got photos to remember this fairly rare vehicle and I got something unique to play with for a few hours. (Heck.. he even offered to let me drive it afterwards but, true to the photography driven person that I am, I had already used up all my time shooting. I really gotta stop doing that..)

While there's probably nothing here that'll blow your socks off, this was a fun chance to practice some light painting with a light colored car (I know, I know - white cars are easy!), and to even try a little light painting and rigging. So yeah.. here's some funky color graded images of a JDM beauty queen in a fairly simple Midwestern town.

View fullsize Cory-2sm.jpg
View fullsize Cory-8sm.jpg
View fullsize Cory-Xsm.jpg
View fullsize Cory-1sm.jpg
View fullsize Cory-3sm.jpg
View fullsize Cory-9sm.jpg
View fullsize Cory-11sm.jpg
View fullsize Cory-13sm.jpg
View fullsize Cory-6sm.jpg

Gear: Sony A7RIII, Sigma MC-11, Canon 17-40 4L, Canon 24-70 2.8L, Tiffen CPL, Yongnuo YN360, Manfrotto Tripod

Post Processing: Adobe Lightroom & Adobe Photoshop

tags: Sony, Acura, Wichita
categories: Lighting
Thursday 01.24.19
Posted by James Sanny
 

Night Shooting

For a variety of reasons, I've recently become obsessed with shooting at night. While I've been terrified of dealing with artificial lighting in the past, educational opportunities and experimentation have pushed me out of my comfort zone and into a completely new realm of photography. So far, I'm over the moon about the possibilities. The tones you can control when working entirely with artificial lighting is probably my favorite part of this whole experience.

Making use of a Yongnuo YN-360 and an Einstein E640, I've been pretty content with the results so far. Mixing in techniques like shooting the car at a higher aperture (to ensure it's entirely in focus) and then blending a background from the same angle but shot at a shallower aperture setting, has helped give me more control over the final image. This is by no means a new technique but it's definitely one that has helped me in isolating my subject, holding onto sharpness across the entire vehicle, and gives me a long enough exposure time to paint the vehicle.

View fullsize IMG_3132b4b.jpg
View fullsize IMG_3132b4.jpg
View fullsize IMG_3132sm.jpg

If it's possible, I've been opting to leave filters off of my camera when shooting at night. Sure, cutting reflections is valuable when working with glossy vehicles but, for me, battling the more pronounced refraction issues of that extra glass filter just isn't worth the hassle. Honestly, if you're shooting with a strobe, you can typically shoot at a higher shutter speed to cut the ambient reflections completely out. If you're working with a wand and light painting, that's a different story.

When deciding which method I'll use to light a car, light painting or strobing, it typically boils down to a couple of factors: 

  1. What color is the vehicle? If the vehicle is any color aside from black, I'm pretty game for strobing it. To me, strobing it produces some nice gradients in the color and light, which feels more natural. Since black vehicles don't have any color to help carry the light across the body lines, they typically react better to light painting (or strobing with large modifiers) to show contour and shape. That said, even when light painting a black vehicle you will find better results if you make use of a softbox to help make the light source larger and softer. (The two black vehicles in this post are great examples of what happens if you don’t use a large light source for painting - they basically look like outlines.)

  2. Where will I be shooting the vehicle? If I'm working with a location that has a lot of ambient light, I'm more likely to strobe my subject vehicle. It's harder to leave the shutter open longer to paint a vehicle with light if I'm battling overexposure from various local light sources. (I know, I know.. Couldn't you use ND filters or stop the aperture down more? Sure - but that means you'll need to increase light output from your light painting device to compensate.) But, if I'm working in an area that has little ambient light to worry about, I may opt to light paint the vehicle. Once you get the hang of light painting and how to position the light to hide it in the body lines, it can be faster than messing with strobes, battery packs, light stands, modifiers, etc.

View fullsize ADV1-Brian14.jpg
View fullsize Port-Murci-LightPaint.jpg
View fullsize IMG_3120sm.jpg
View fullsize Muttstang-1sm.jpg
View fullsize IMG_2921smB.jpg
View fullsize IMG_3248sm.jpg

Keep in mind - these are not rules. I won't only light paint vehicles with color on them, or not strobe a black vehicle (though I've yet to do this). They're just some things I've run across when shooting that have helped me create a baseline when deciding how to approach lighting a vehicle. 


Gear: Canon 6D, Canon 17-40 4L, Canon 24-70 2.8L, Canon 70-200 2.8L I, Canon 85 1.8, Tiffen CPL, Yongnuo YN360, Einstein E640, Sunpak Tripod

Post Processing: Adobe Camera Raw & Adobe Photoshop

tags: Canon, Wichita, Lamborghini, Audi, Ford, Honda, VW, Acura
categories: Lighting
Wednesday 12.19.18
Posted by James Sanny
 

Todd Grant's incredibly clean Hondas (TBC)

A few years back, when I was fully devoted to building Cinemauto and figuring out automotive videography, I was in search of more local builds that were unique and clean. Let's face it.. Wichita doesn't exactly have the most booming car scene. Outside of race cars and classic restorations, the culture in these parts is fairly milk toast. In a moment of sheer desperation, I took the advice of a couple friends that suggested I meet with a guy (Todd) who had two uber clean Honda builds. (It's not that I dislike Hondas or their fan base - but Fast & Furious didn't really do any favors for the community and our local Honda scene was already knee deep in clapped out sedans with stainless fart cannons, aluminum wings and neon gauges. Still can't imagine it? Pep Boys was our equivalent to The Racer's Edge.)

As luck would have it, Todd and I both ended up reaching out to one another simultaneously. He had seen some of the previous video work we'd done and I decided to live dangerously and gamble our future on the most common place cars around. Or so I thought. Upon actually meeting with Todd, I was swept away by some of the simplest, cleanest, most tastefully modified cars I'd ever laid eyes on. 

The cars were gently lowered to a position that enhanced the existing body lines. They just looked like they were already on the move, and they were sitting perfectly still. The subtle addition of air dams, splitters, and rear lips ushered away all notions that these were the same daily driver your dad drove to work. And while I'd love to talk up his choice of wheels, Todd runs wheels on his cars like Sneakerheads run Jordan Ones. They're the best of the best and they're only on until he gets bored, when another set, even better than the last, tags them out for a brief intermission.

Anyway - for the folks interested in some backstory on his cars, here's a link to the video we did a couple years back. You'll notice that the Civic has already seen a few changes compared to my photos, and the Integra will likely look different once I'm done with that set!

View fullsize IMG_3248sm.jpg
View fullsize IMG_3263sm.jpg
View fullsize IMG_3294sm.jpg
View fullsize IMG_3258sm.jpg
View fullsize IMG_3274sm.jpg
View fullsize IMG_3312sm.jpg
View fullsize IMG_3310sm.jpg
View fullsize IMG_3307sm.jpg
View fullsize IMG_3253sm.jpg
View fullsize IMG_3252sm.jpg
View fullsize IMG_3251sm.jpg
View fullsize IMG_3315sm.jpg
View fullsize IMG_3316sm.jpg

Gear: Canon 6D, Canon 24-70 2.8L, Canon 85 1.8, Tiffen CPL, Yongnuo YN360, Einstein E640, Sunpak Tripod

Post Processing: Adobe Camera Raw & Adobe Photoshop

tags: Canon, Wichita, Honda
categories: Lighting
Thursday 12.13.18
Posted by James Sanny
 

Dear Super Street,

46510637_10101883503076992_6263055206632652800_o.jpg

As a lover of import vehicles with style and speed, I've been a fan of your magazine since before I could drive. I'm from a part of the country where, back then, we had very little in the way of car culture. To be honest, aside from some beastly drag cars, we're still more of a truck culture around here. Your magazine was a window into a world I always wanted to be apart of. A place that I knew existed but just couldn't quite escape to.

Some twenty years later, still living in the bread basket of America, I'm still picking up issues of your magazine and dreaming. Though I'm older and more financially responsible these days, so I tell myself, I'm still pretty much just a spectator in the world of car building. While I love a good turnout at my local cars and coffee, and occasionally join my local VW enthusiast group for a monthly meal out, doing more than daily driving my car is still outside of my wheelhouse.

While builds still haven't become a huge part of my life, there is one part of your magazine that has truly resonated with me all of these years. The photographs. The images your photographers have created to share these incredible build stories with your fans are absolutely superb. It's hard to do these unique vehicles justice in just a handful of images, and yet your team manages to pull it off, time and time again. Your visual presence is where I first fell in love with your publication, and it's now where I dream to find myself within the automotive community. 

In the last few years, I've focused my interest in car culture on documenting it. While I've still got much to learn, I'd love to share some photos with you of a local build that I think would be a perfect fit for your publication. (Heck, you've included a shot of his car in your events section in the past - so it's clearly up your alley.) It's a 1987 Volkswagen GTI, purchased 20 years ago by a high school freshman, that's been completely transformed.

Of all the car magazines out there, you are the one who introduced me to tuning style and culture. While I know your focus isn't primarily on European cars, I also know that you've included some truly exceptional European builds in the past. I ask that you consider this one for your magazine, and that you review the private gallery I've passed on to your editor. It would be a dream come true to see my friend's build in the pages of your publication - especially if it were my photos used to share it with your fans.

Update: They accepted my request and gallery! The feature was released in the special Euro issue, in July of 2019. You can see the story and photos on their site!

View fullsize IMG_3061sm.jpg
View fullsize IMG_3388-1sm.jpg

Gear: Canon 6D, Canon 70-200 2.8L IS I, Einstein E640, Yongnuo YN-622C Triggers, Neewer Light Stand, Sunpak Tripod

Post Processing: Adobe Camera Raw & Adobe Photoshop

tags: Canon, VW, Wichita, Super Street
Wednesday 11.21.18
Posted by James Sanny
 

Cars & Colors 2018 - The Shows

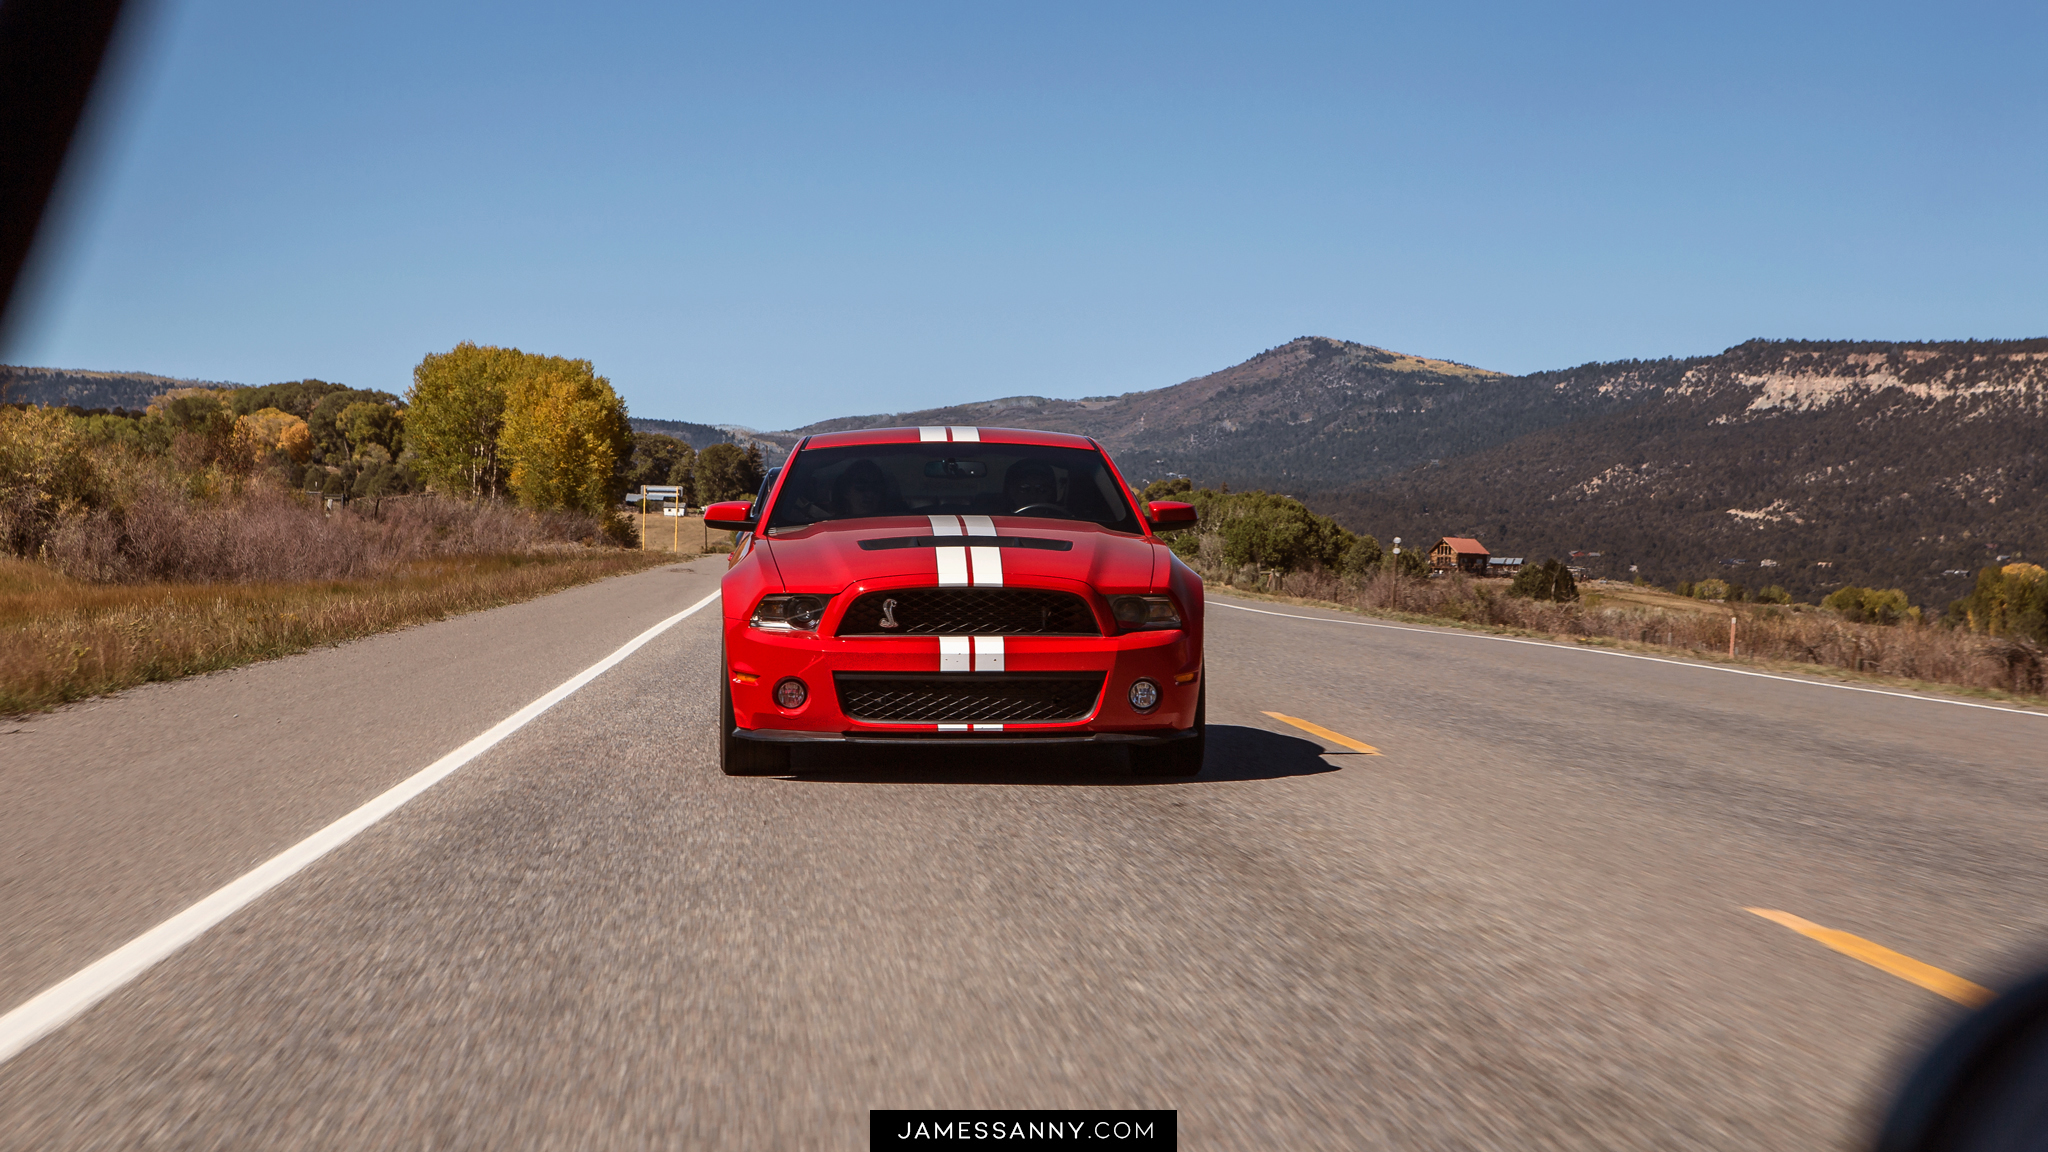
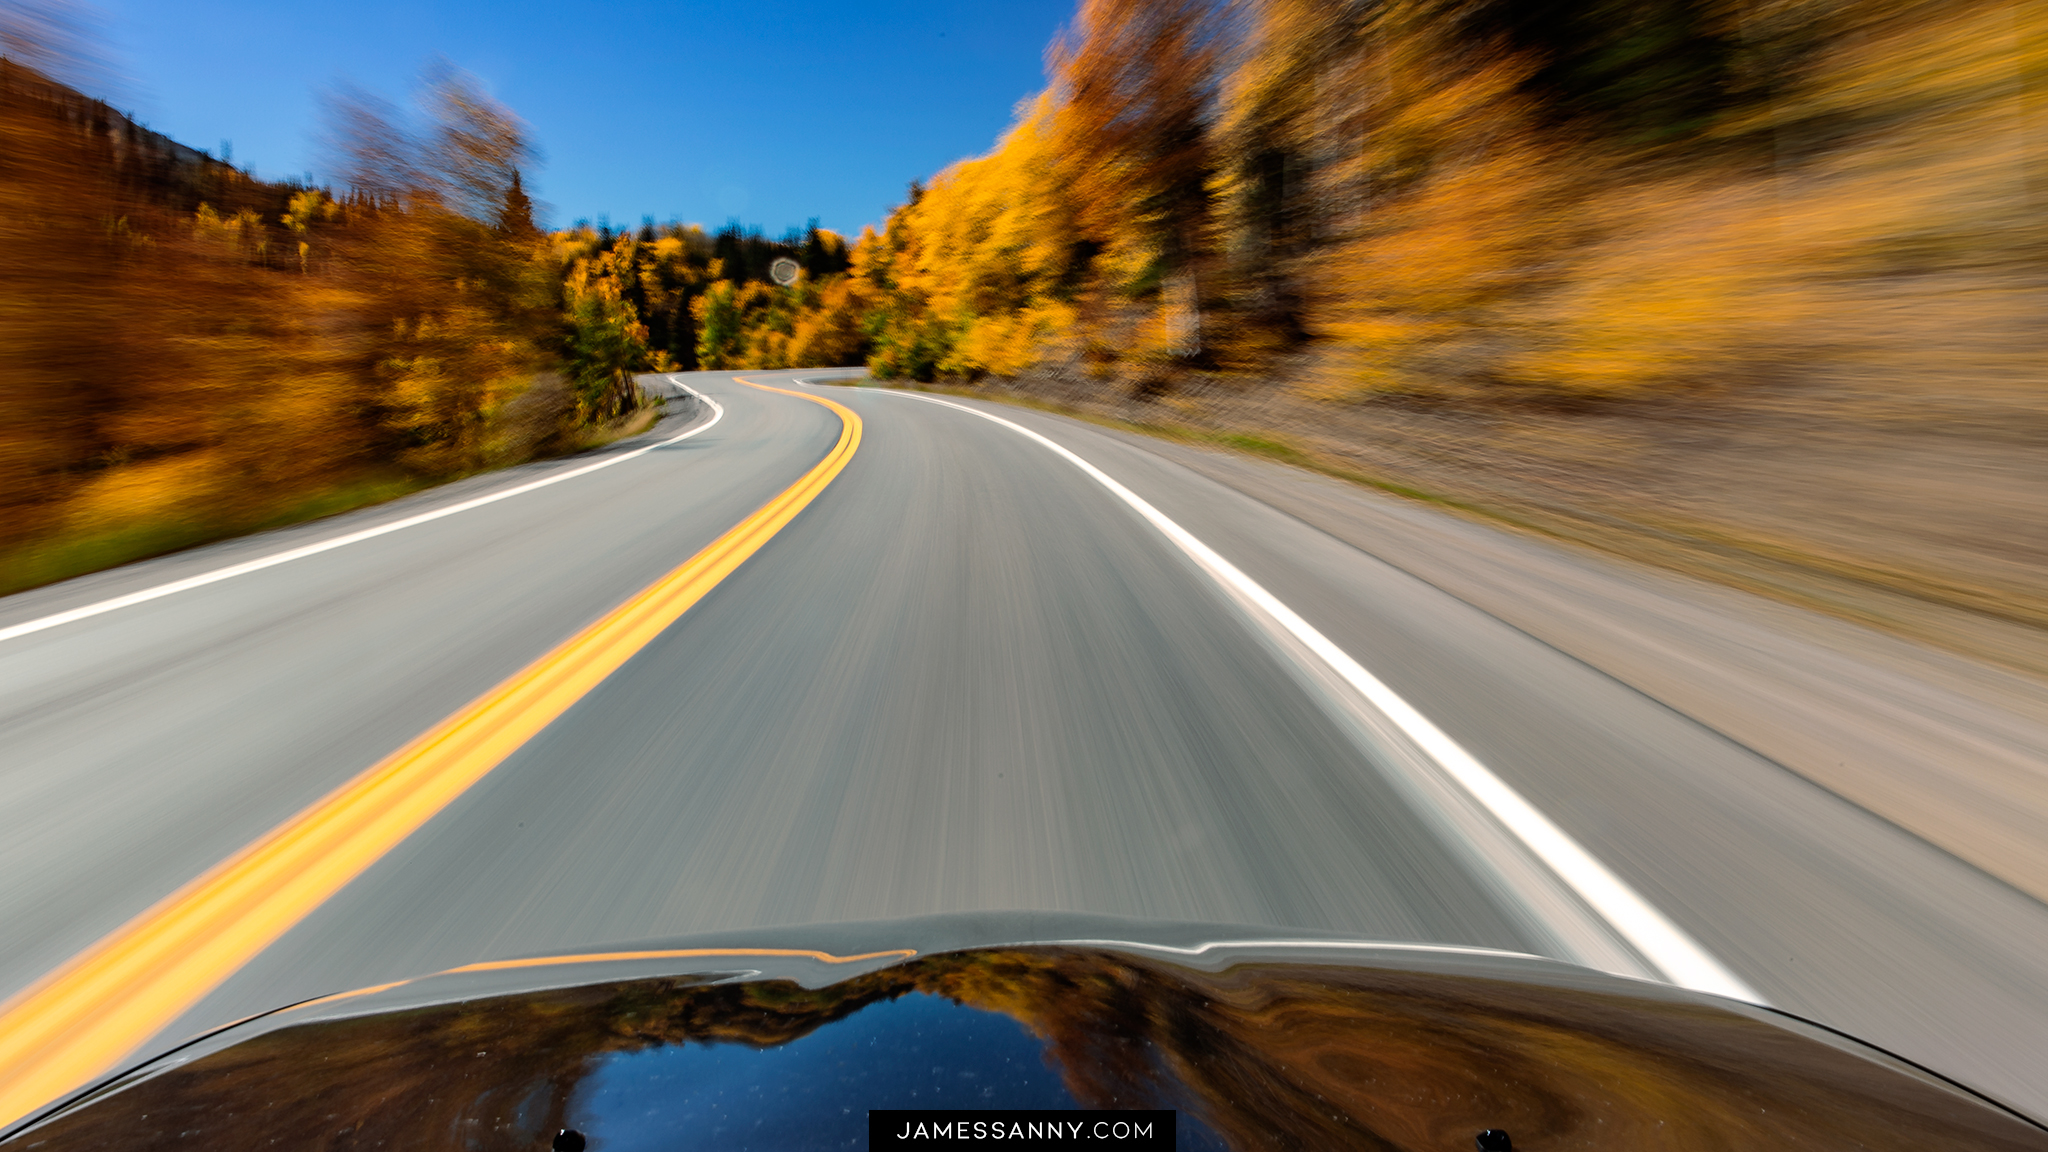
In late September, I returned to Telluride for the 4th Annual Festival of Cars & Colors. Much like last year, I was immediately swept away by the colorful trees, the incredible mountains, and all the beautiful cars. Even two days before the show, we happened to spot some really special stuff that was just out and about. That confirms just how special and unreal this place truly is.

This festival boasts a variety of activities for attendees over the course of 3 days - though it's worth it to show up a day early so you can register and join in on the free eats from local restaurants. Friday marks the launch of the festivities, with a morning meet up that shares everything you have to look forward to that day; information about the road rally, the poker run, the medallion hunt, and much more. Since the rally is my primary interest for the day, I can't speak to how awesome the rest of the events for that day are - but who wouldn't want to cruise through the San Juan Mountains with a variety of super cars, vintage race cars, and other fun luxury vehicles? The sights are worth the gas and the friends you meet along the way make the whole drive worthwhile.

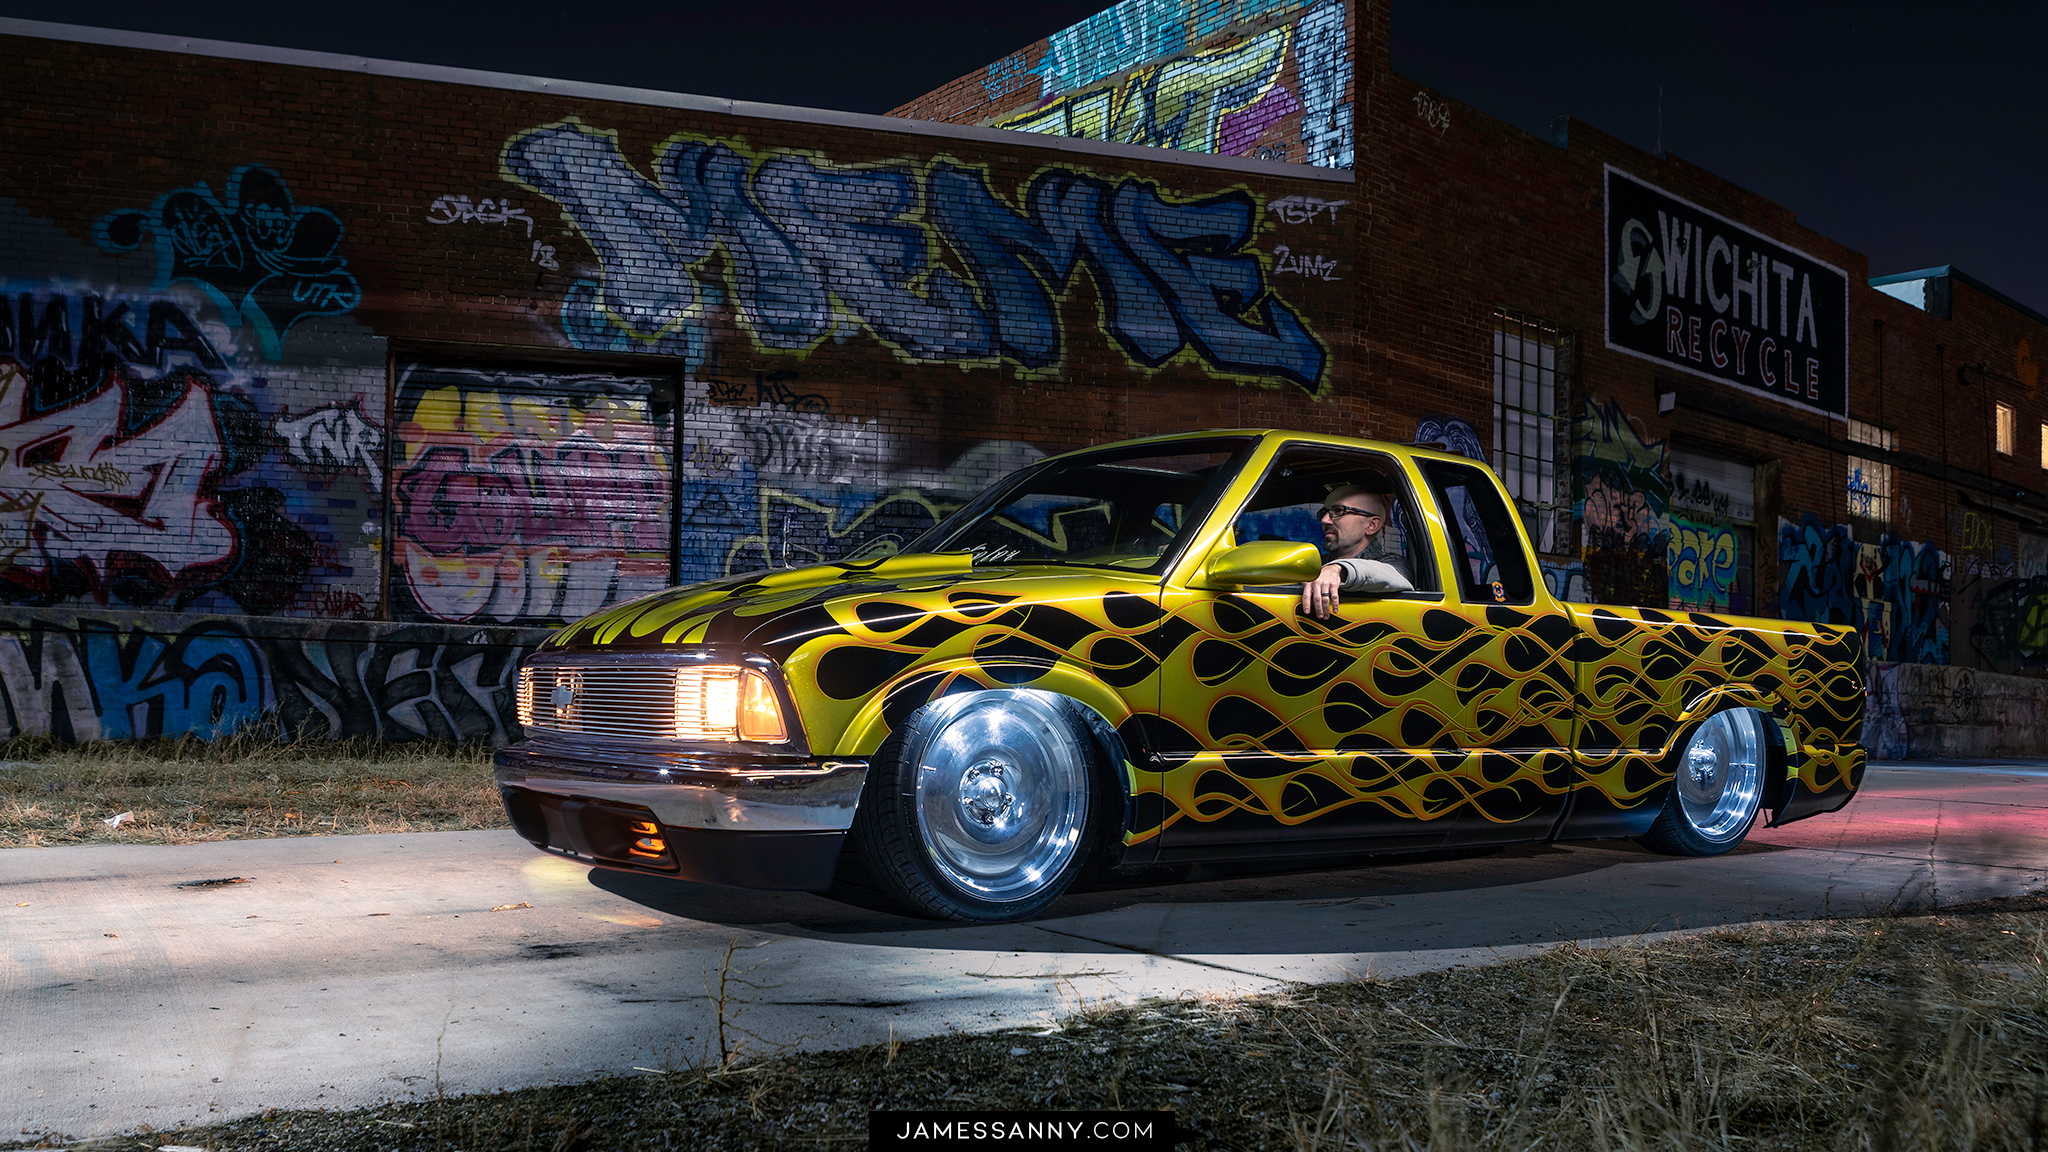
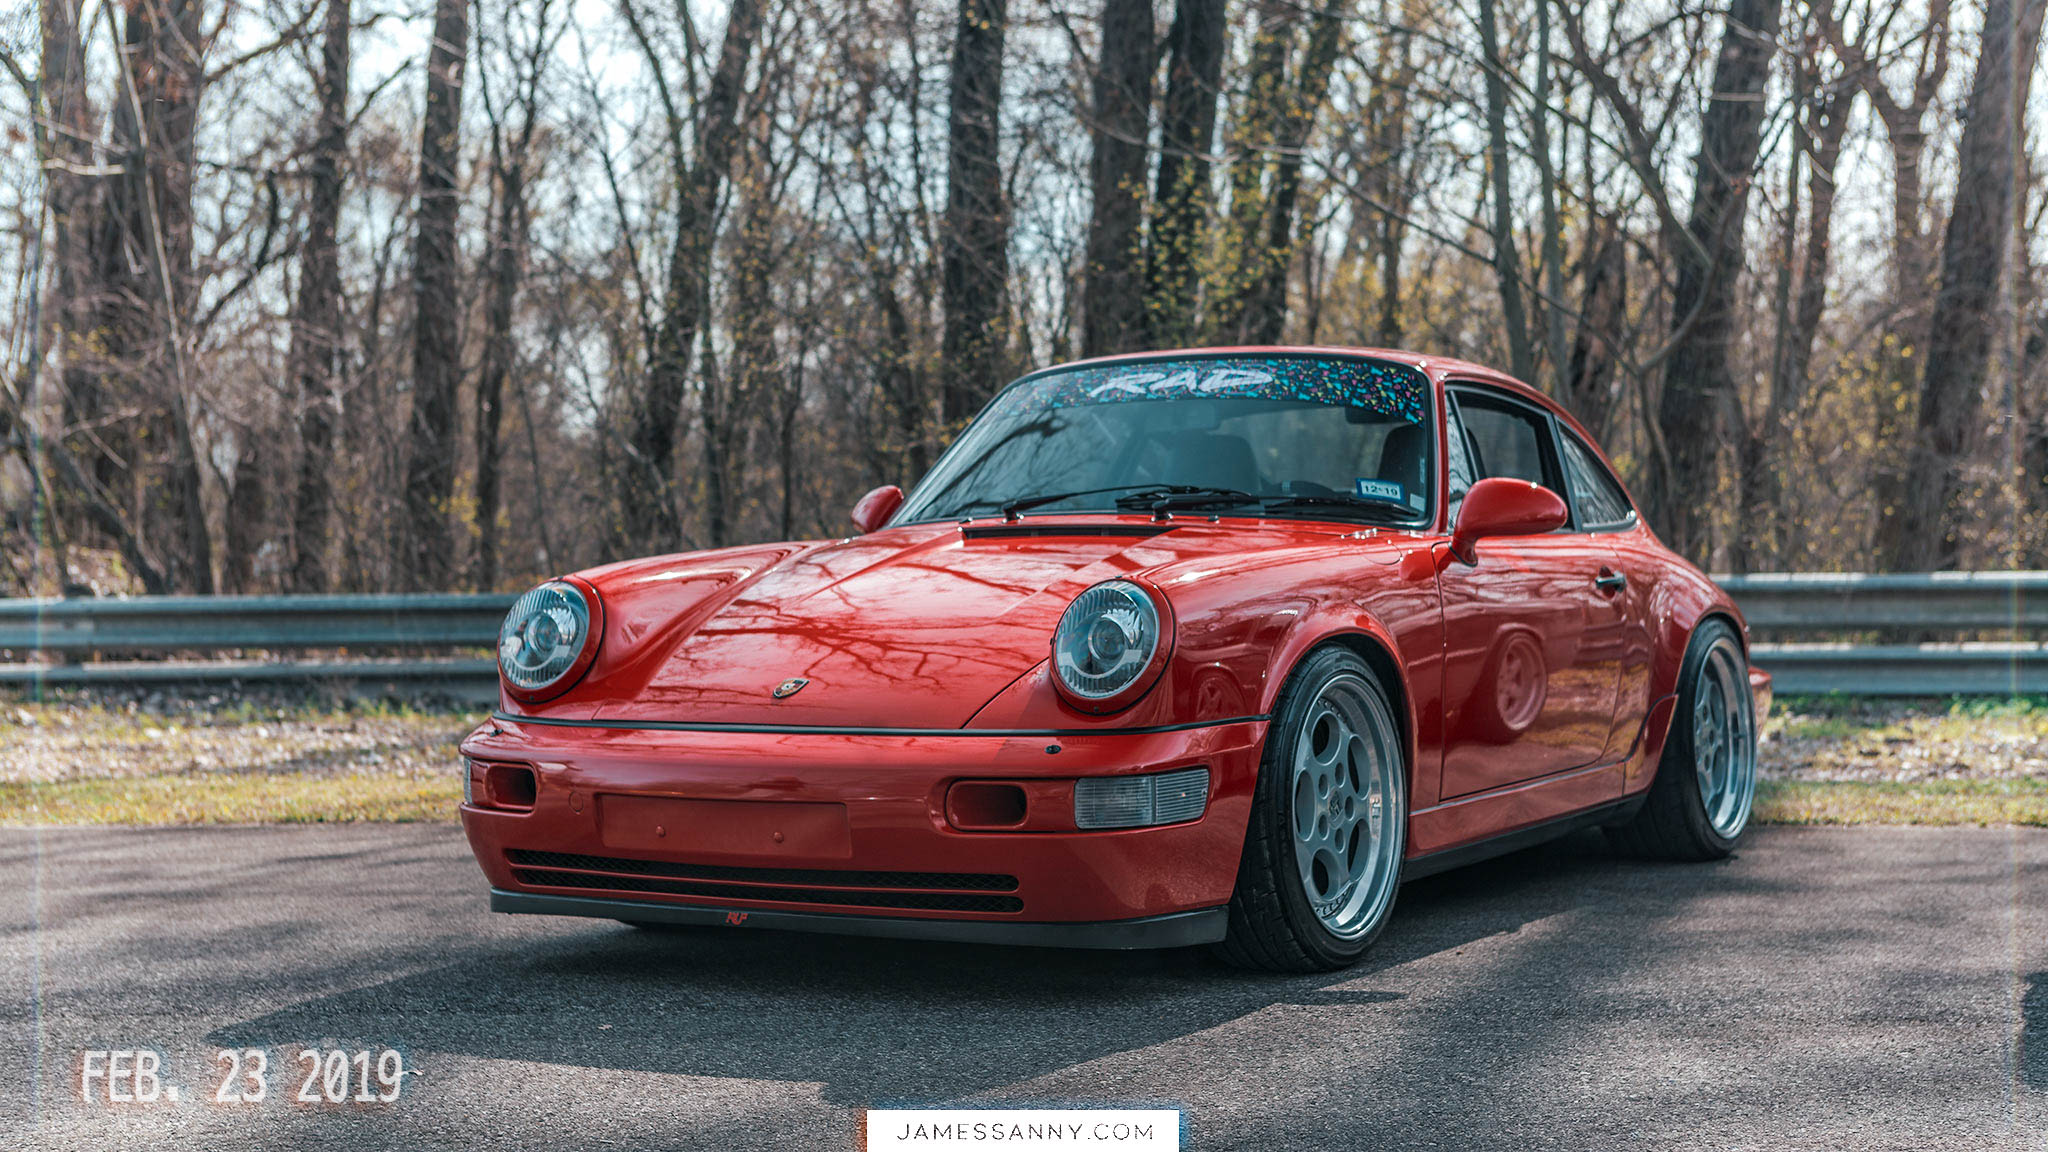
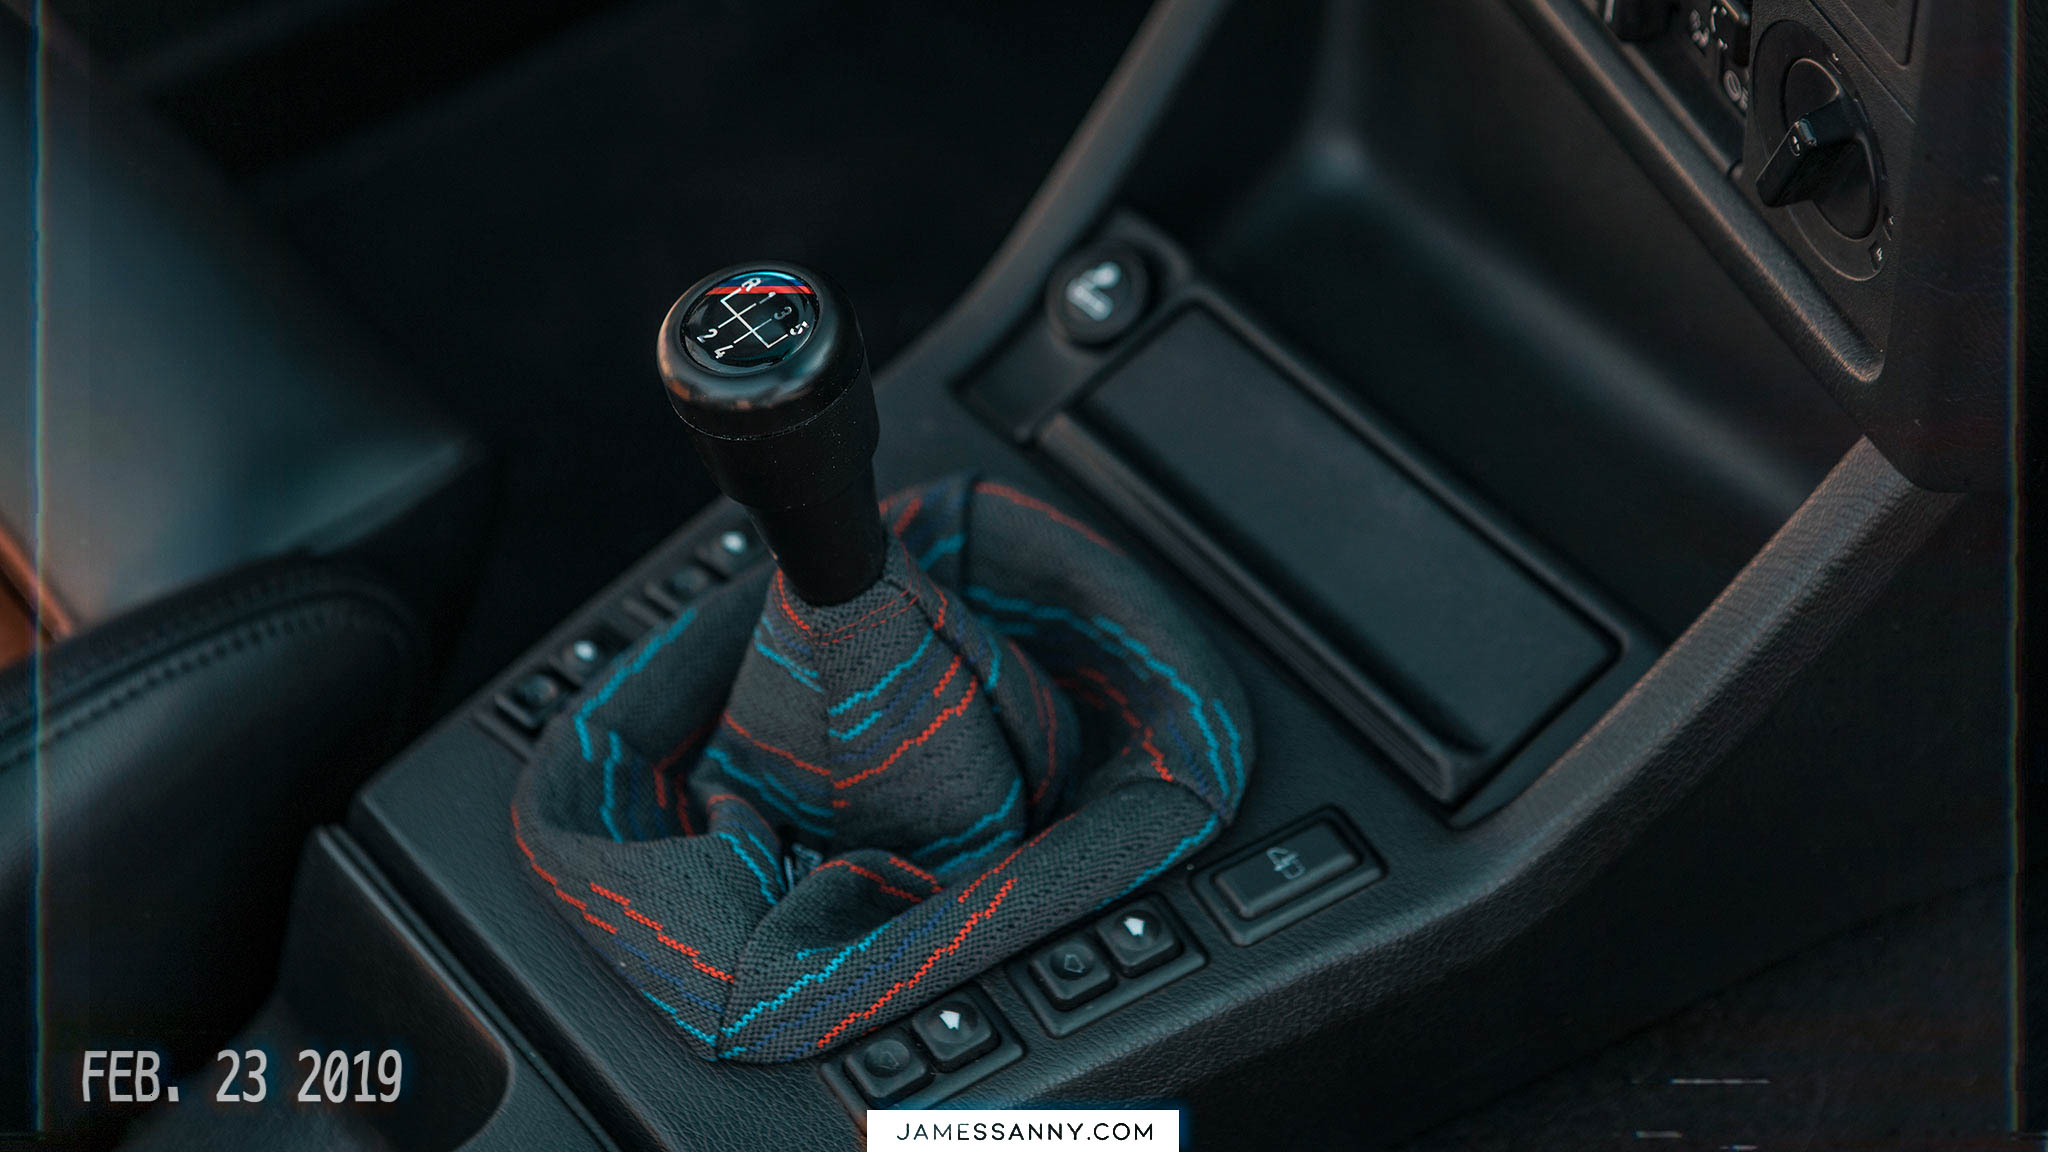
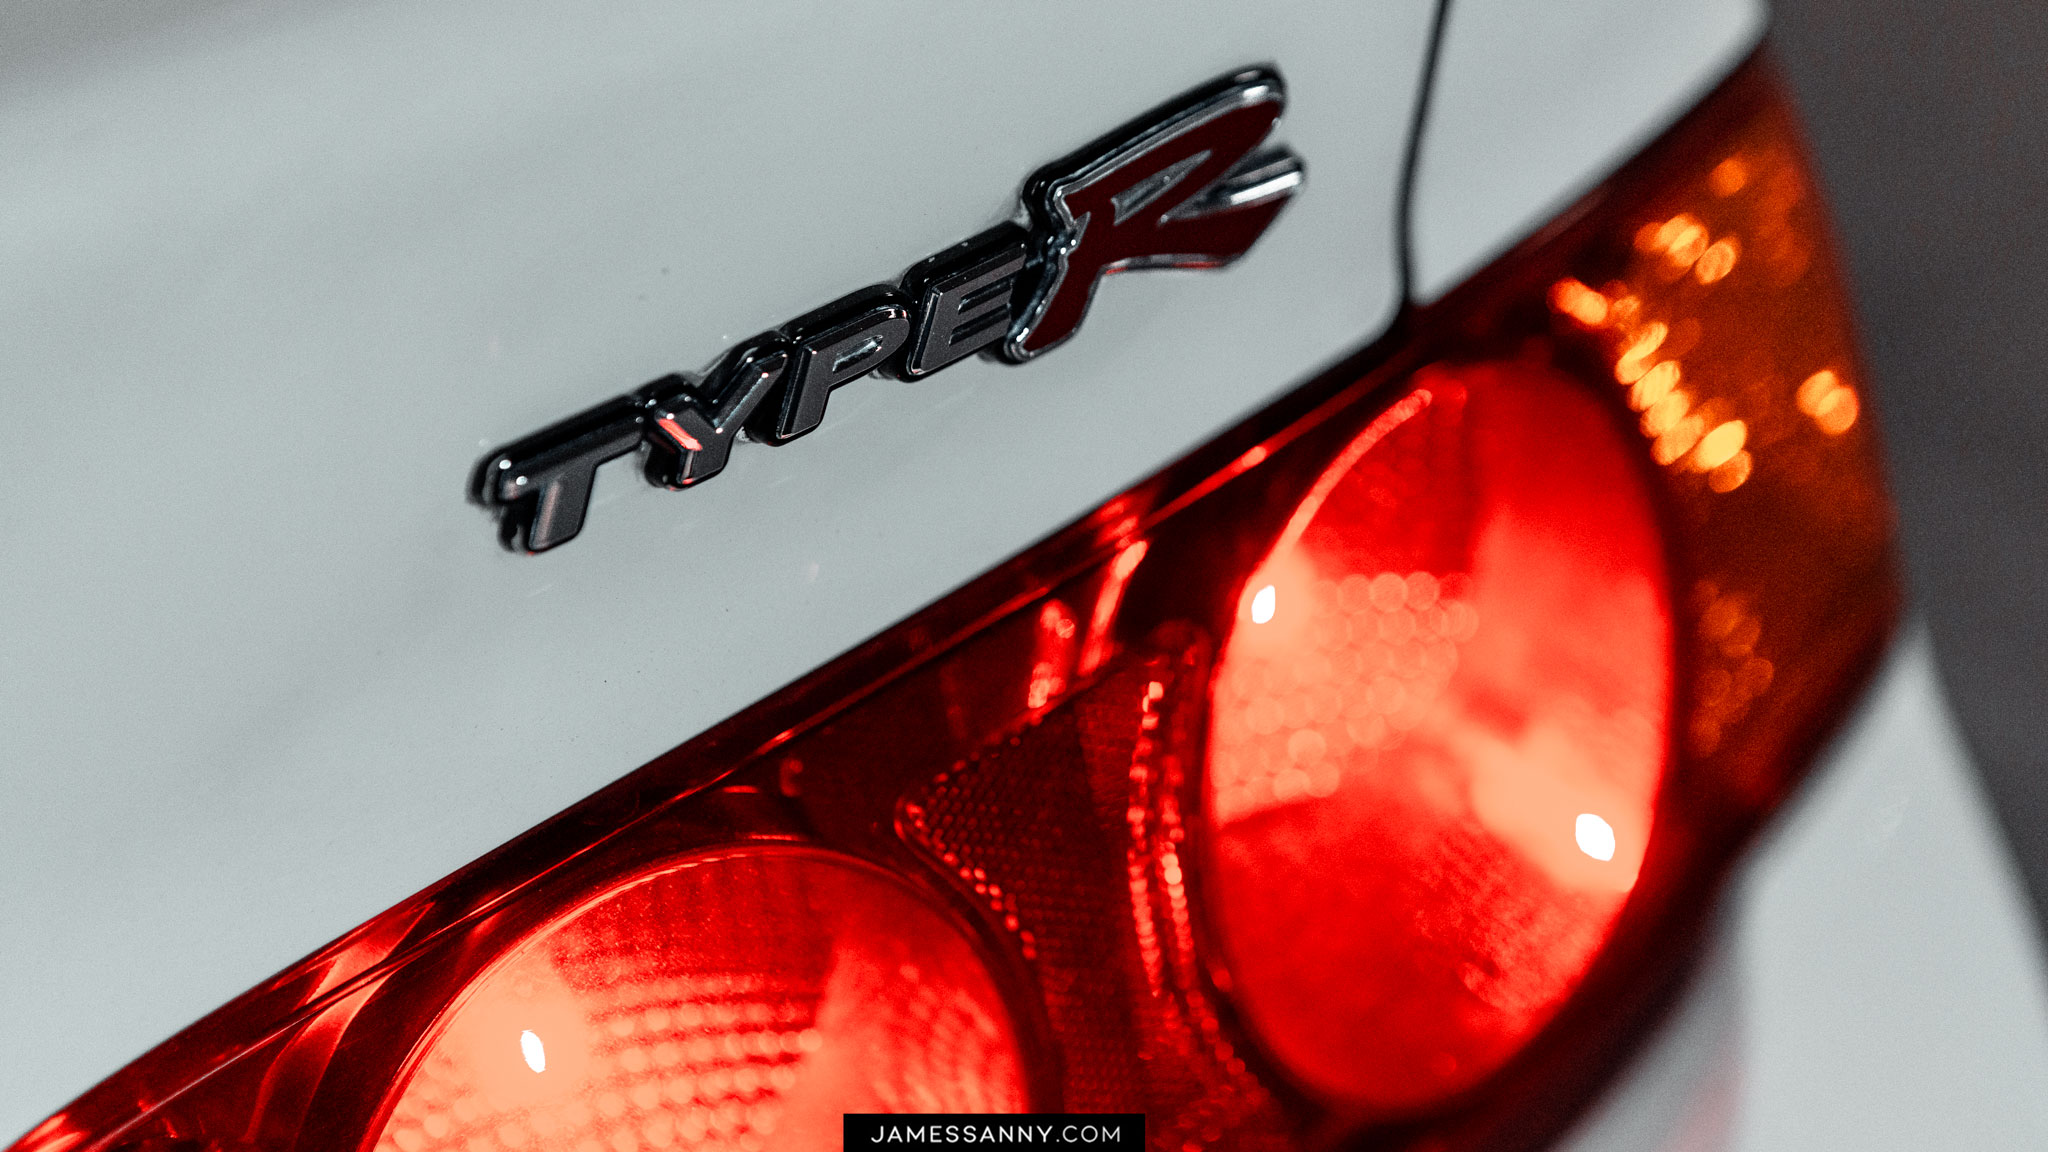
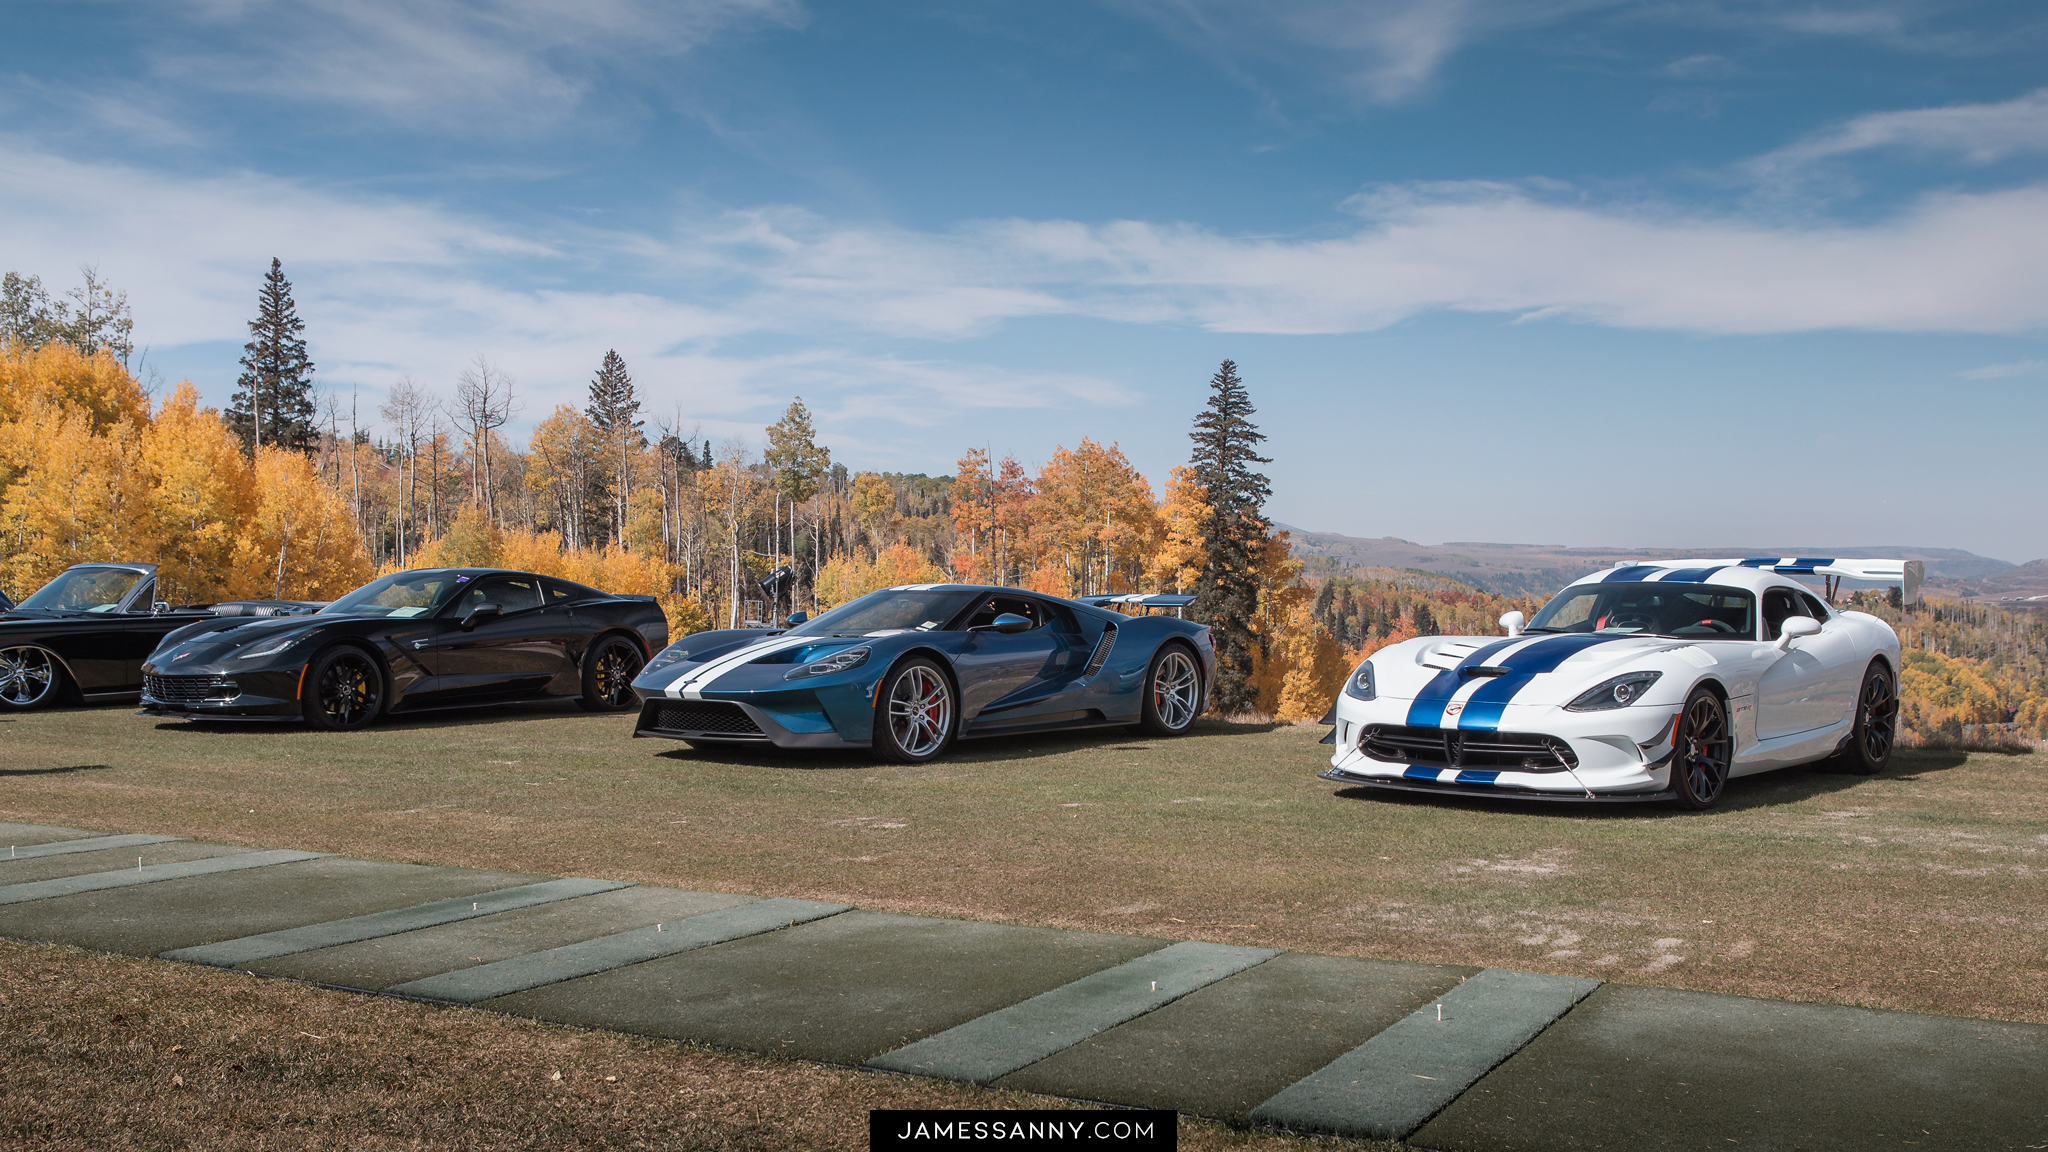
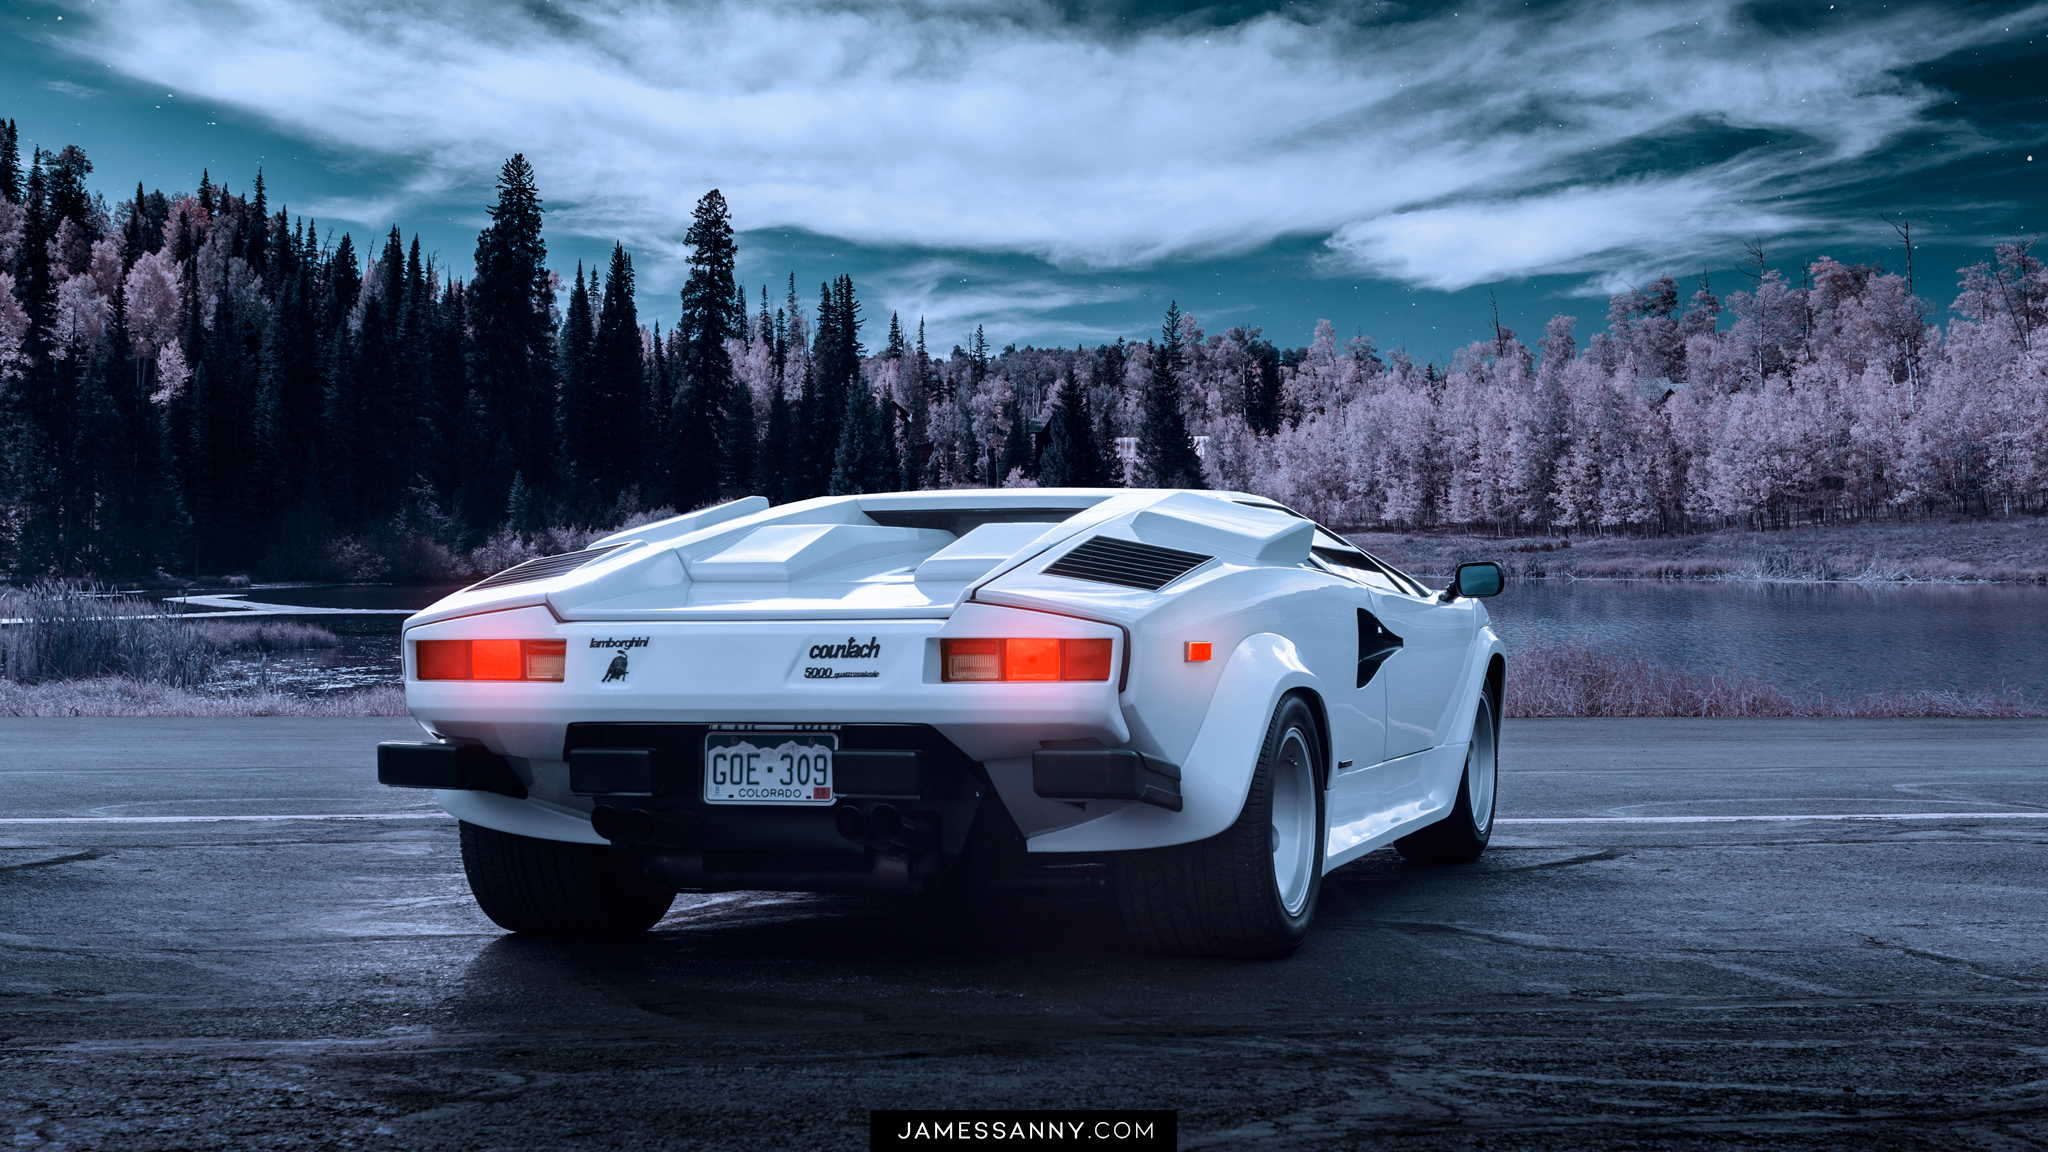
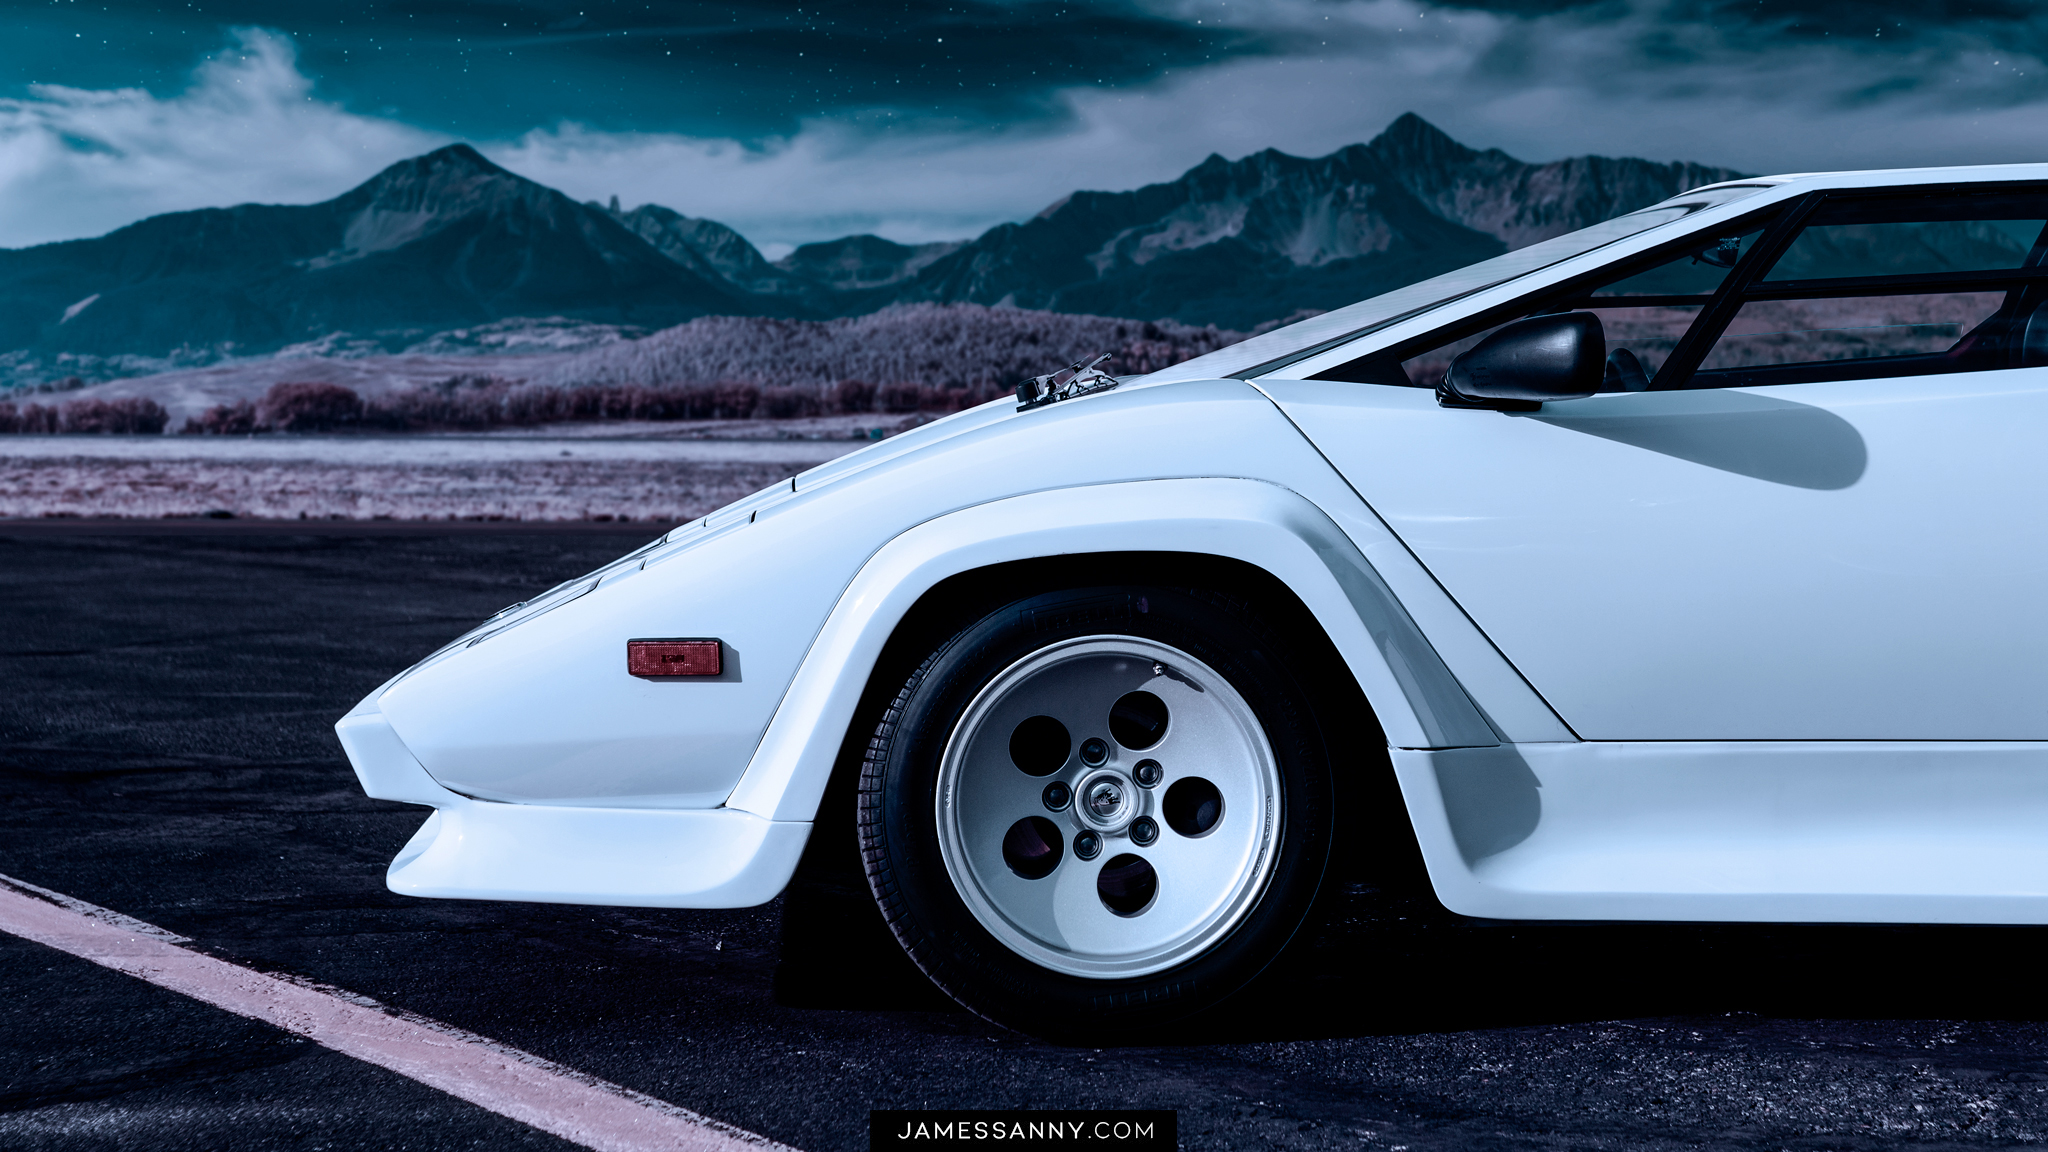
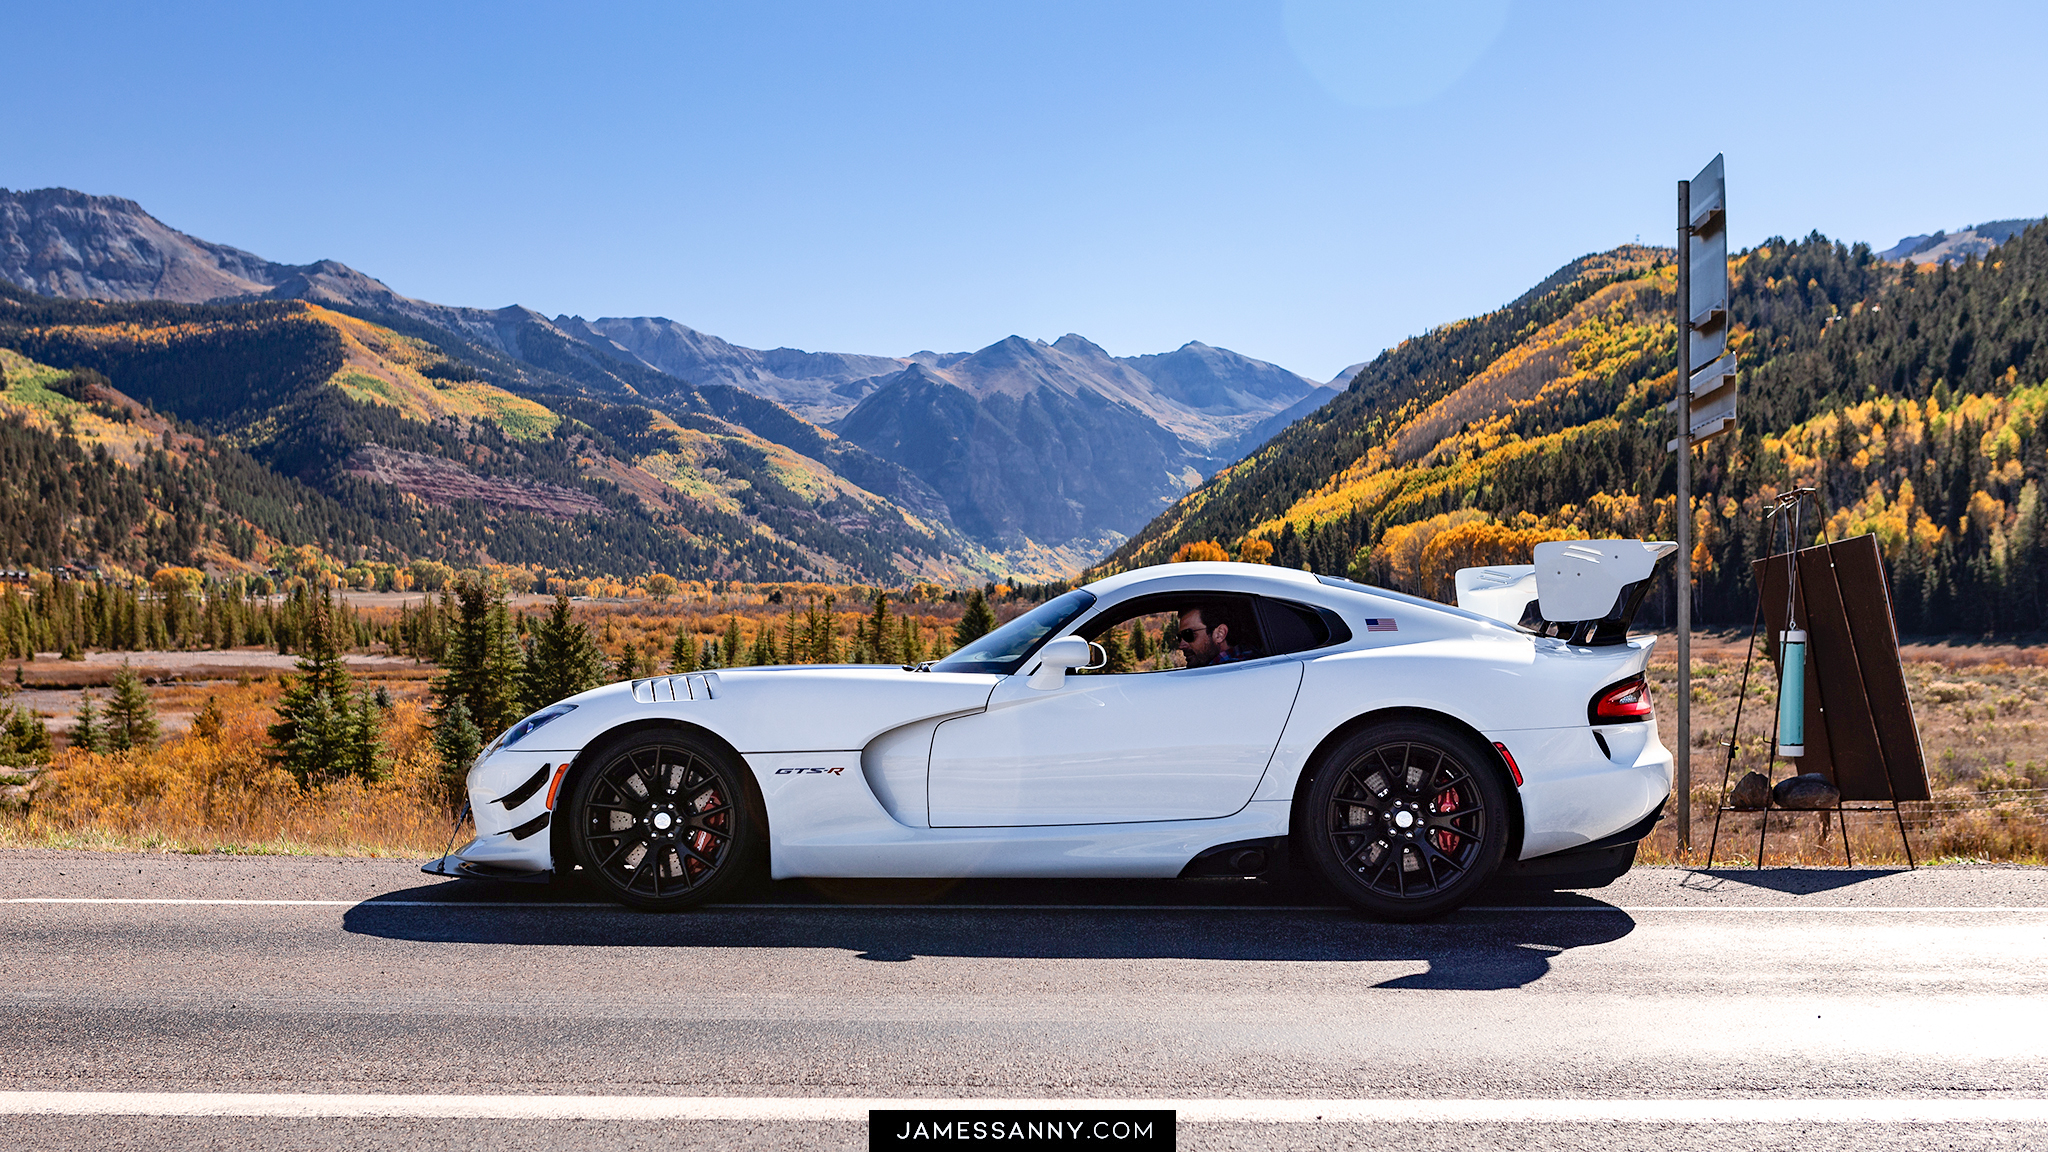
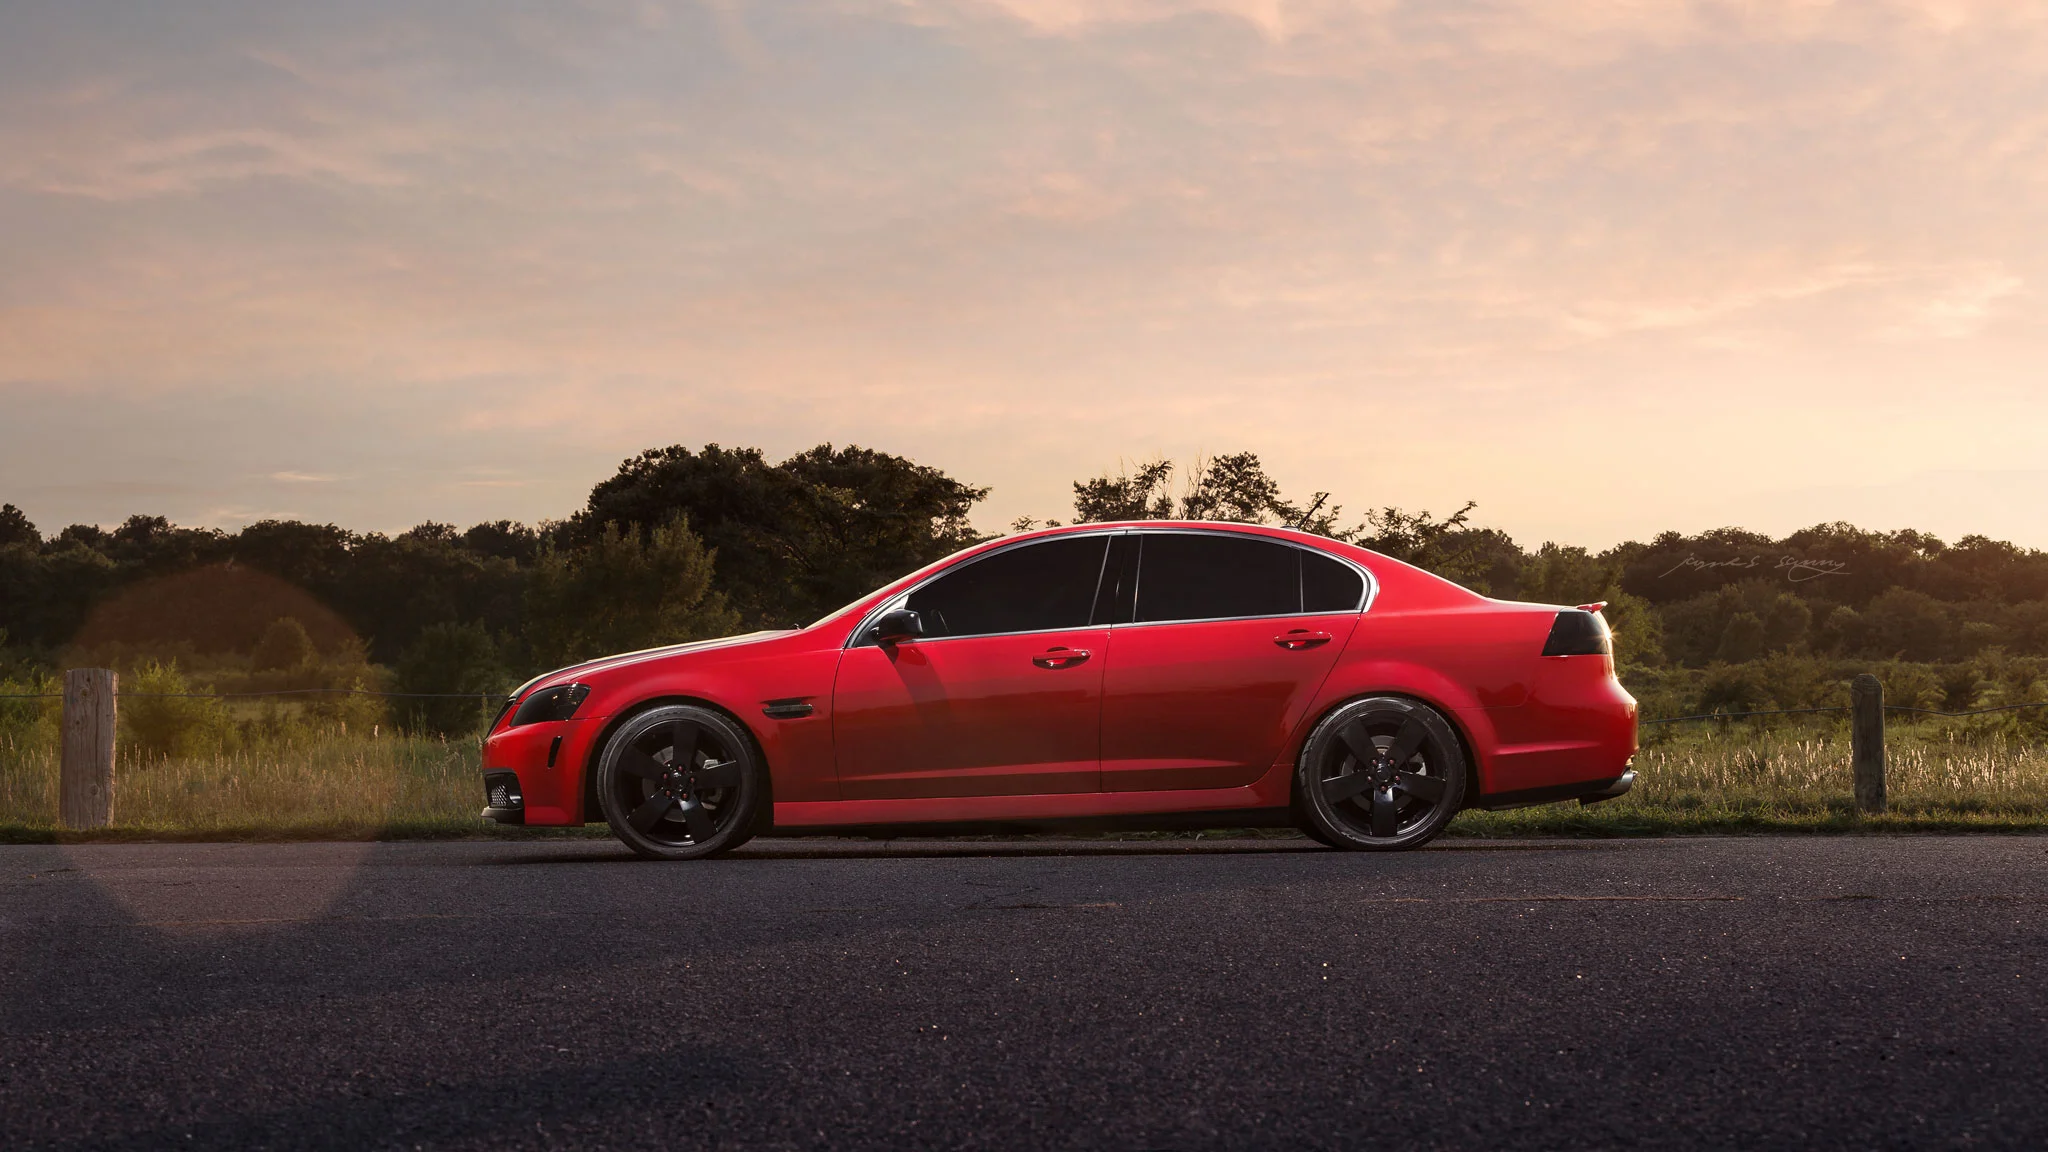
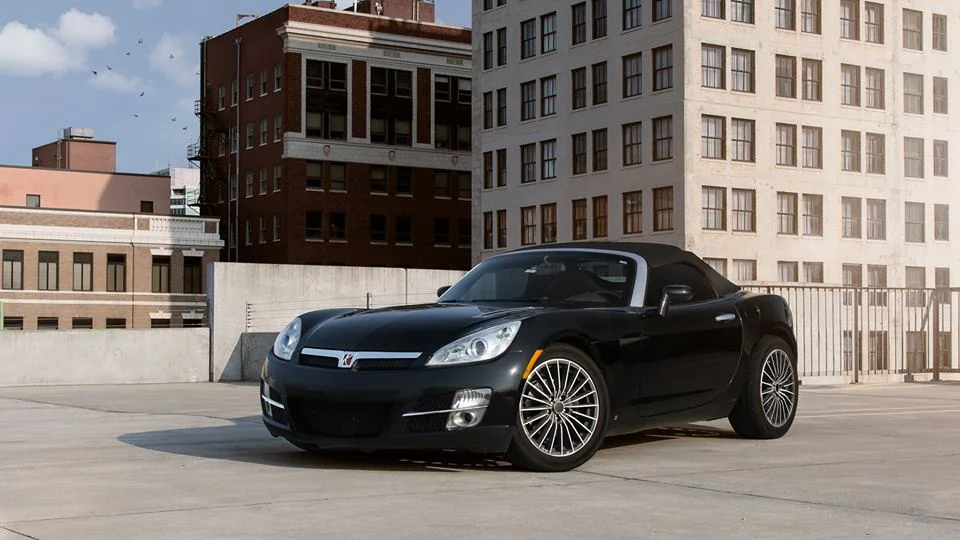
We closed out Friday with a car show on Telluride's main drag, Colorado Avenue. It draws in spectators from all over the state, as well as the locals. Just when you think you've figured out what to expect at a show like this, you'll catch a curve ball here. While I'm not much of an event photographer, I did grab a shot my favorite three vehicles during the show. 

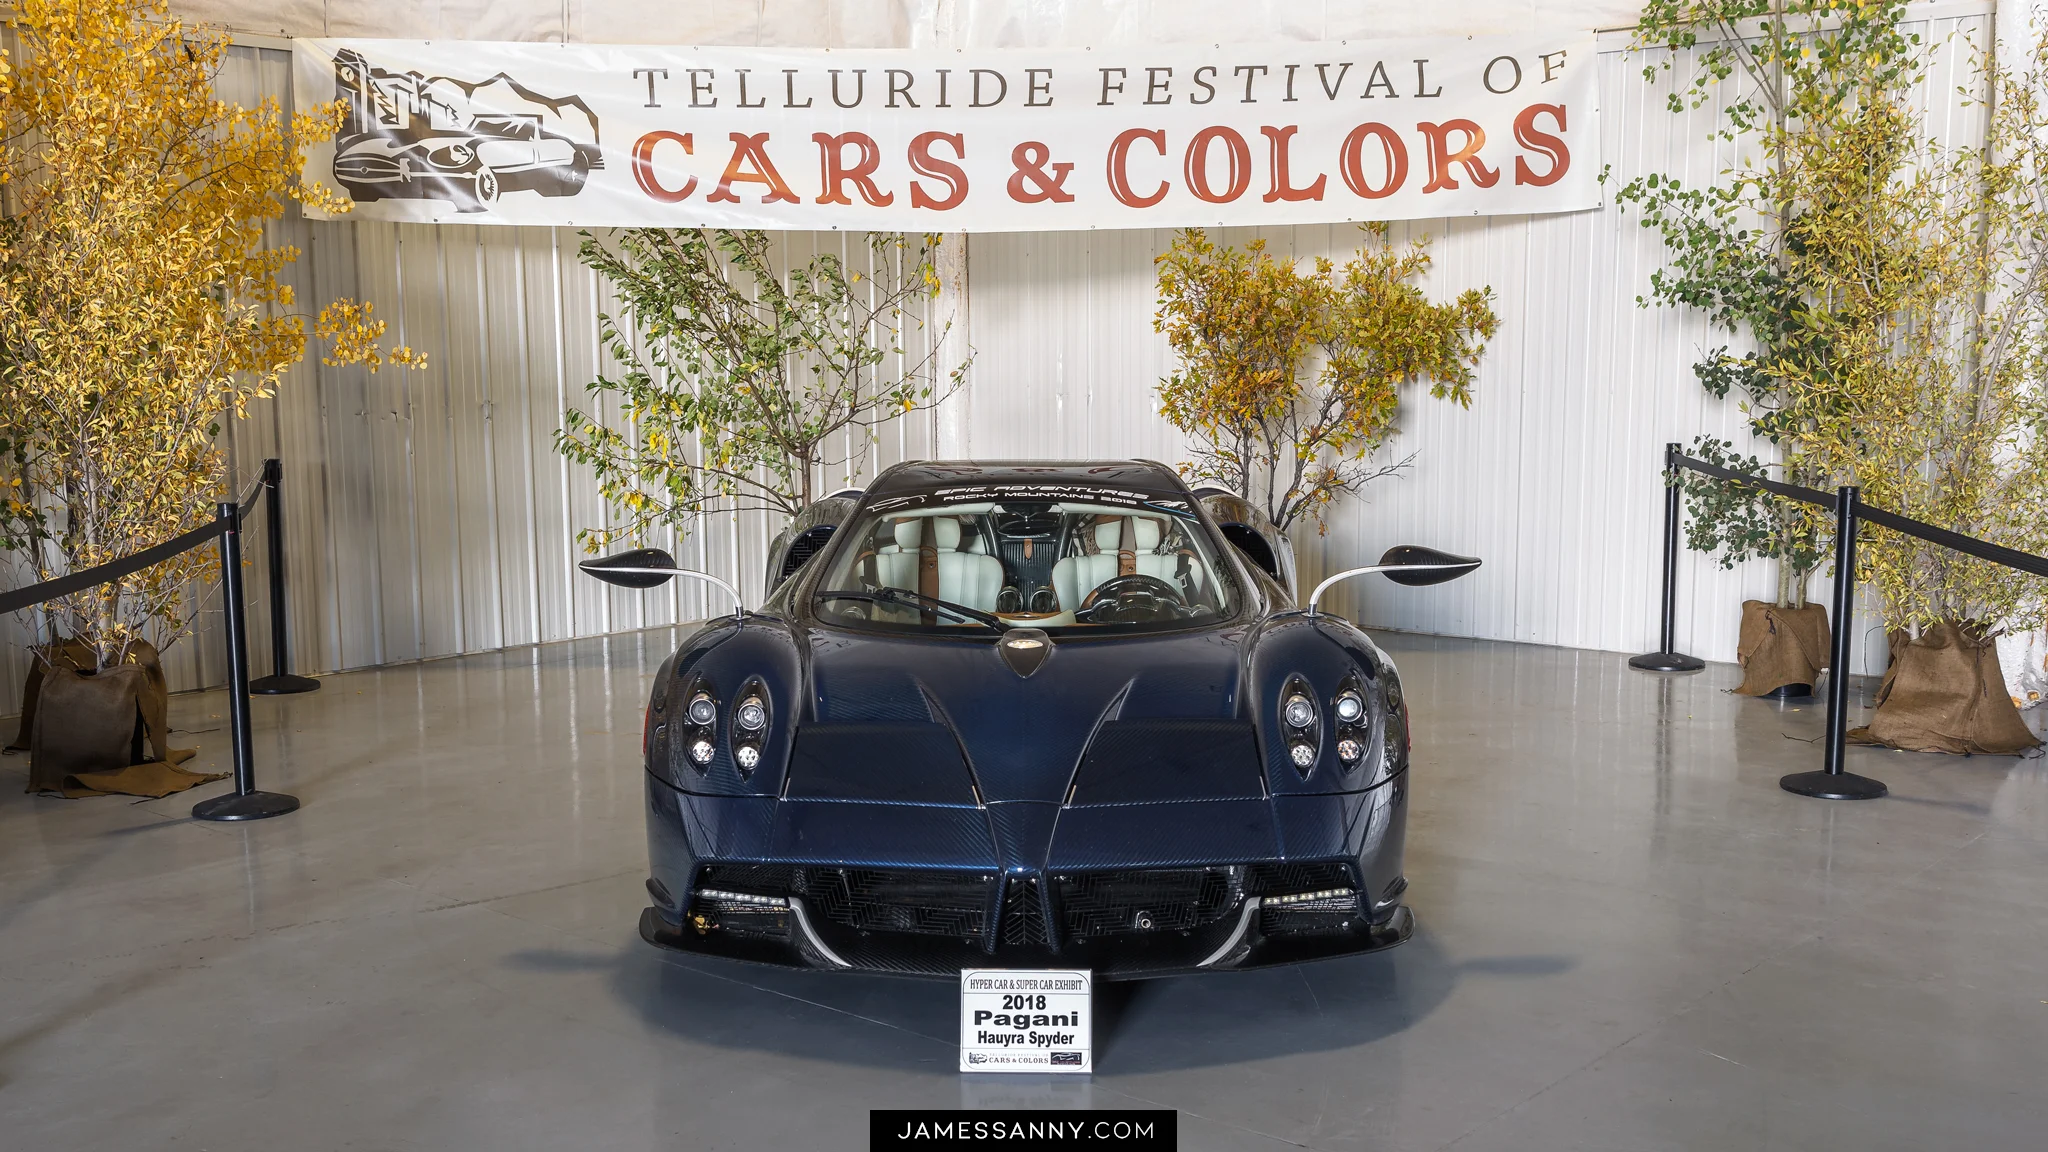
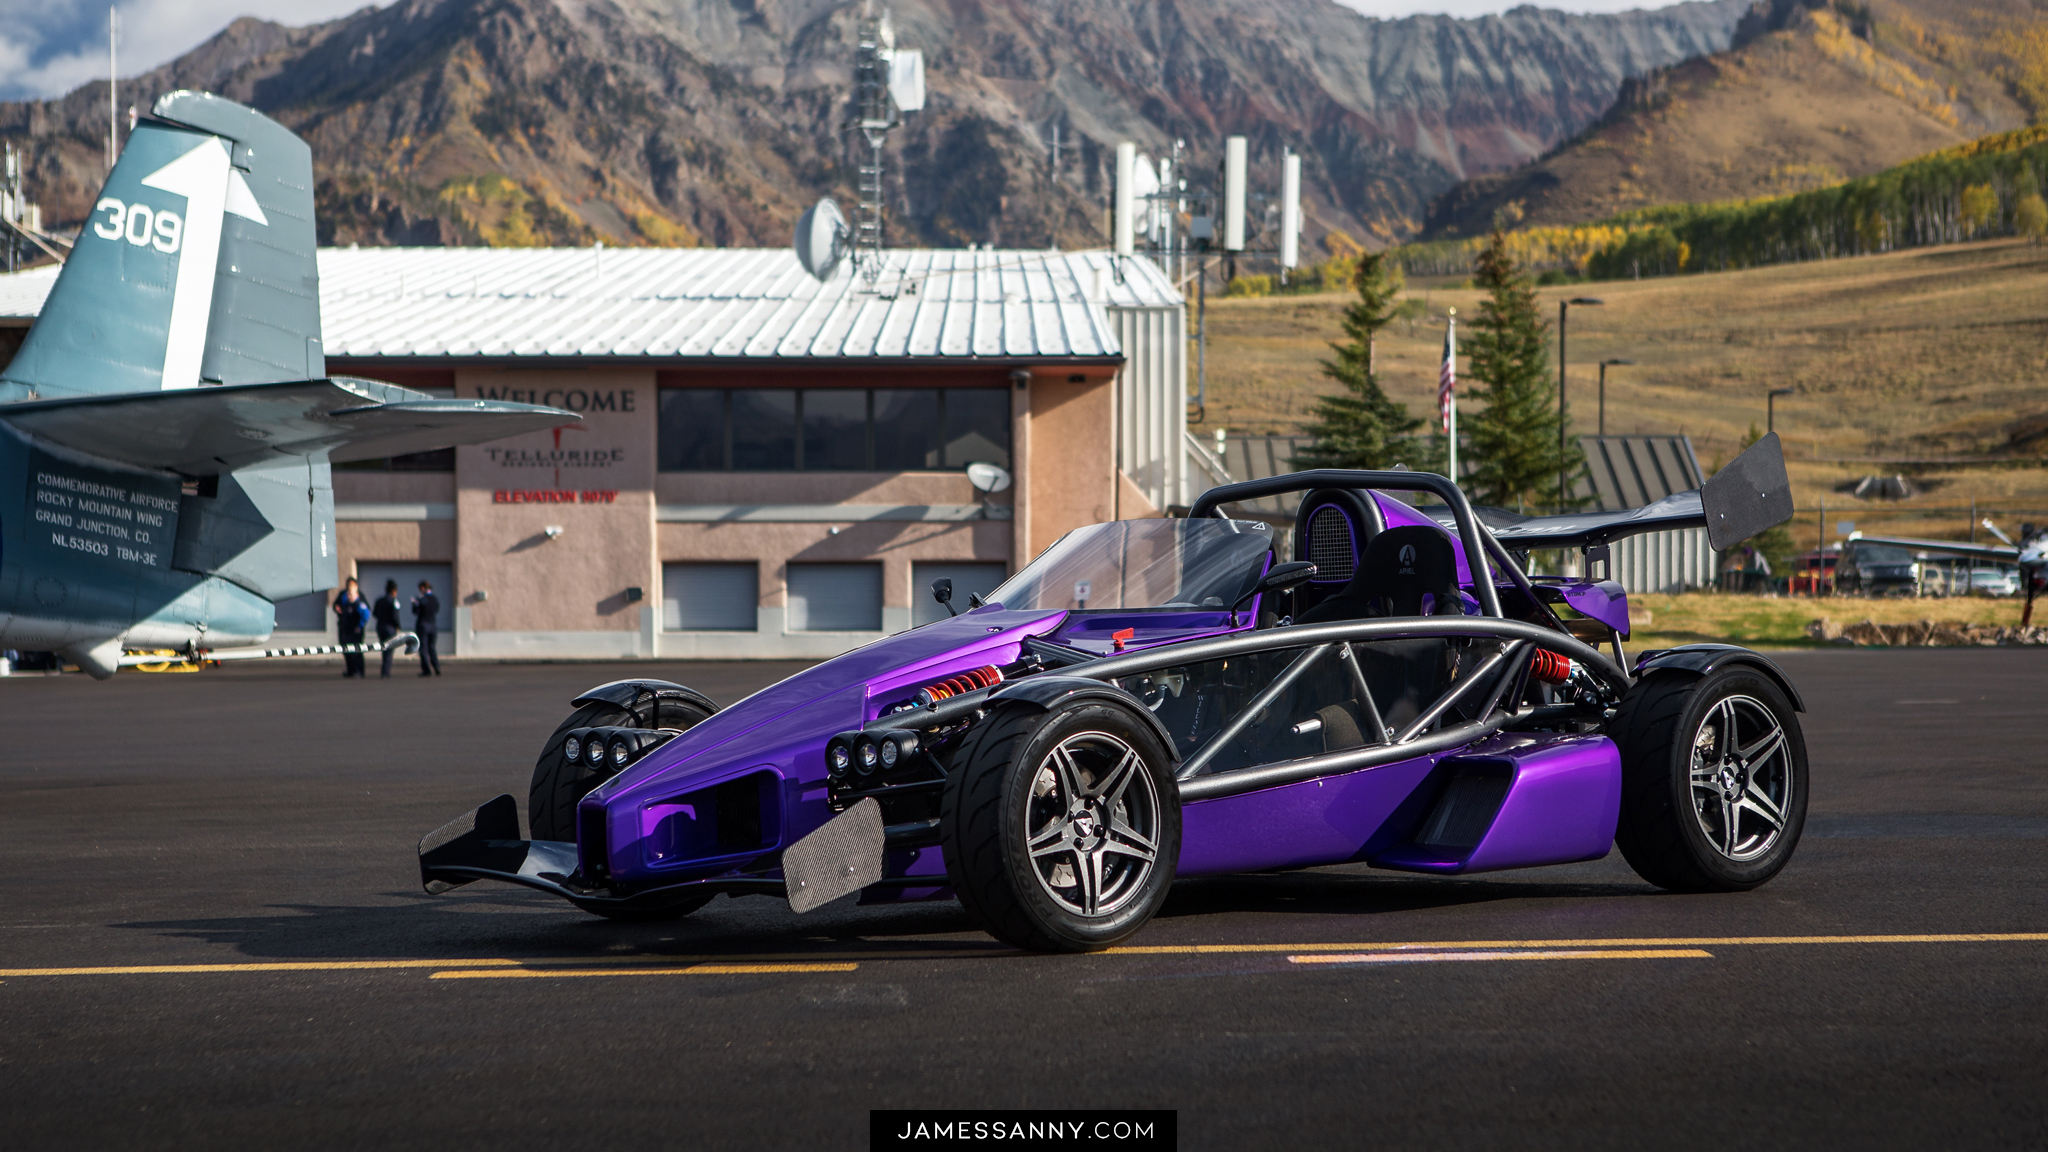
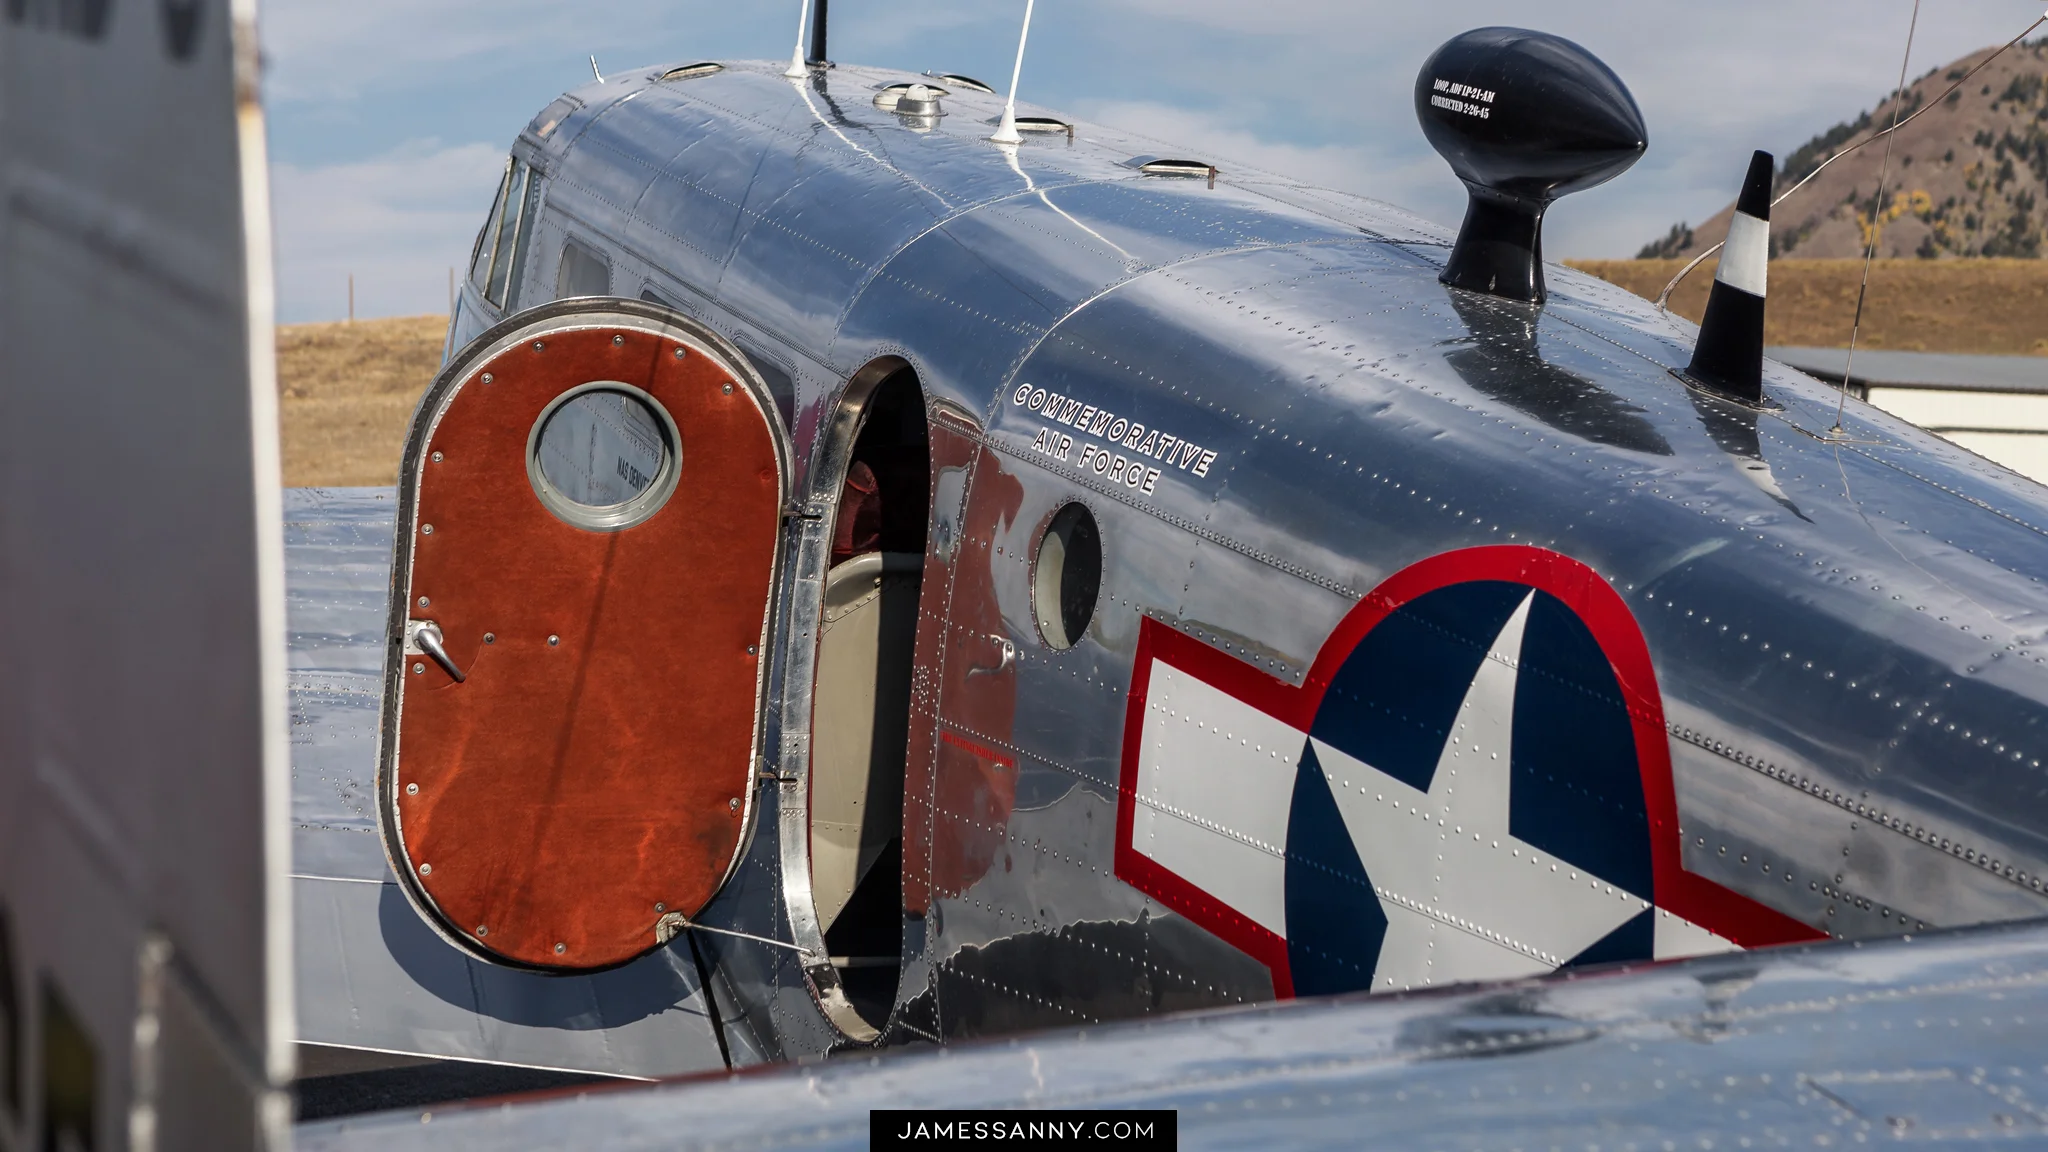
Saturday kicks off with a free breakfast at the Telluride Airport. Have you ever had breakfast on the tarmac of an airport sitting over nine thousand feet above sea level? It's not a bad place to watch the sun rise over the mountains. And when you're finished, you're free to walk the ramp and check out the old warbirds display - including checking out the interiors and even signing up for a trip to the clouds inside one of the planes. Of course, if planes aren't your thing, you can swing into the hangar and get a preview of Saturday night's reception lineup. This year included a hyper car display and Danny Thompson's Challenger 2.

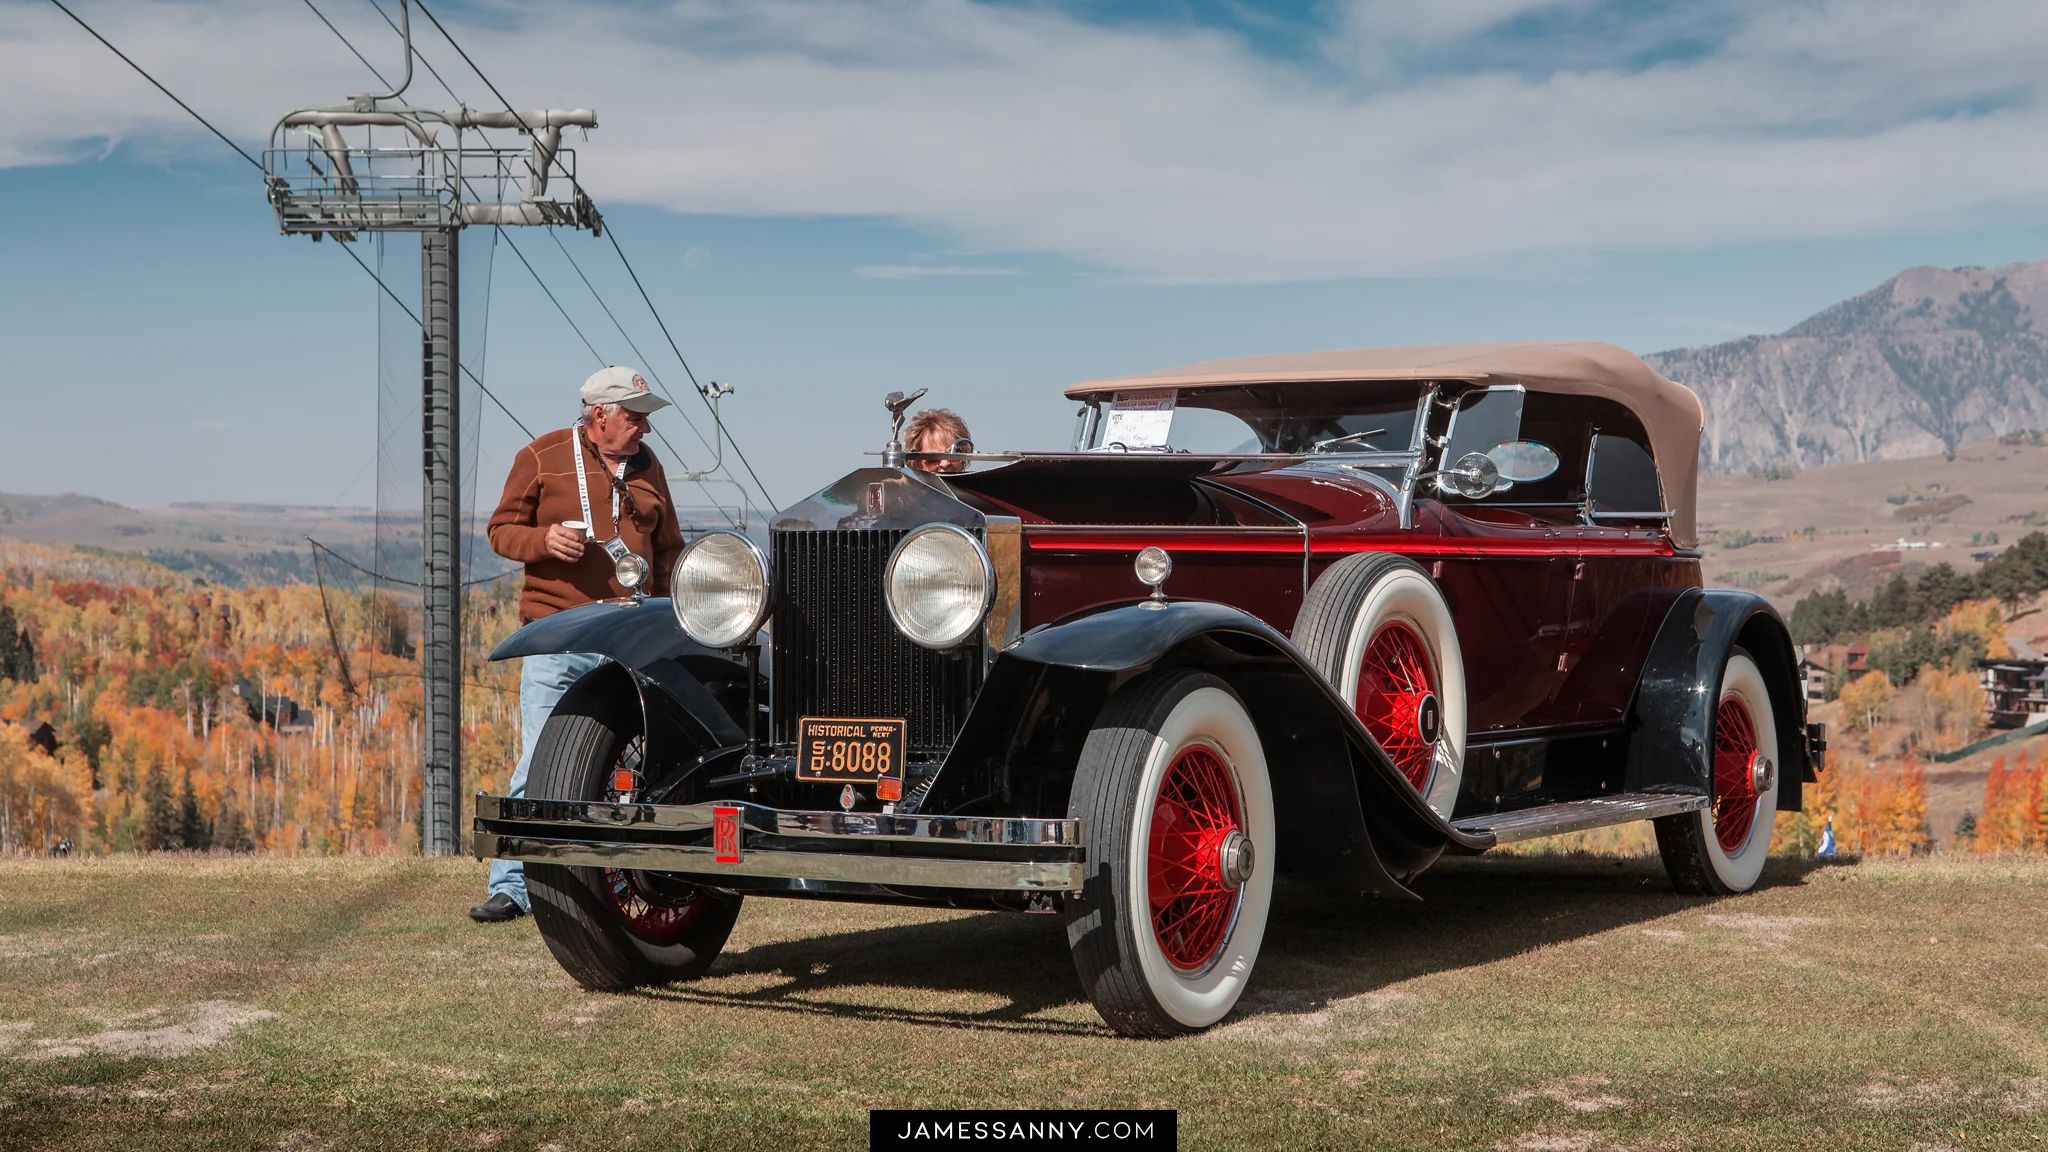
For those who are left wanting more, Saturday also offers an American Concours event located at the Telluride golf course. If you haven't been to a car show on the side of a mountain, I urge you to consider it. Between the cars and the views, you couldn't possibly be disappointed. If you think that's all, think again. The festival coordinators have also managed to pack in another car show back downtown on Colorado Avenue. Sure, you may catch some of the same vehicles spotted during last night's show - but there'll be plenty of other vehicles out on display, too. 

Capping off the 3 day festival, Sunday's schedule puts attendees back out at the Telluride golf course for the International Concours event. All those fancy Ferraris, Lamborghinis and other European cars you've seen cruising around town the last few days? This is where you'll get a chance to see them up close and personal. And for the fans looking for things on two wheels, both days of the Colorado Ave show and Concours events include vintage and restored motorcycles.

I know this sounds like a great big, multi day car show and, to some, that may be all it is. However, for the folks who enjoy meeting new friends, sharing their passions, and traveling to incredibly beautiful places - this is it. The Telluride Festival of Cars & Colors is more than an automotive event. It's an experience. Something to share with friends, old and new. There is no place on earth like Telluride. Don't believe me? Come see for yourself at next year's show!

View fullsize IMG_0448sm.jpg
View fullsize IMG_0449sm.jpg
View fullsize IMG_0470sm.jpg
View fullsize IMG_0609sm.jpg
View fullsize IMG_0631sm.jpg
View fullsize IMG_0674sm.jpg
View fullsize IMG_0683sm.jpg
View fullsize IMG_0693sm.jpg
View fullsize IMG_0707sm.jpg
View fullsize IMG_0712sm.jpg
View fullsize IMG_0736sm.jpg
View fullsize IMG_0767sm.jpg
View fullsize IMG_0797sm.jpg
View fullsize DJI_0027-1sm.jpg
View fullsize IMG_0800sm.jpg
View fullsize IMG_0988-1sm.jpg
View fullsize IMG_1150sm.jpg
View fullsize IMG_9728sm.jpg
View fullsize IMG_9749sm.jpg
View fullsize IMG_9585sm.jpg
View fullsize IMG_9661sm.jpg
View fullsize IMG_9671sm.jpg
View fullsize IMG_9676sm.jpg
View fullsize DJI_0038-1sm.jpg
View fullsize DJI_0011-1sm.jpg
View fullsize IMG_0899sm.jpg
View fullsize IMG_9844sm.jpg
View fullsize IMG_9853sm.jpg

View the full gallery from the 4th Annual Telluride Festival of Cars & Colors.


Gear: Canon 6D, Canon 24-70 2.8L, Canon 70-200 2.8L IS I, Tiffen CPL, Sunpak Tripod

Post Processing: Adobe Camera Raw & Adobe Photoshop

tags: Canon, Telluride, Porsche, Lamborghini, Ford, Dodge, Ferrari
categories: Events
Wednesday 10.24.18
Posted by James Sanny
 

Lamborghini Countach (A Cars & Colors Set)

Event photography is literally my least favorite thing I've ever done. The hurdles you deal with are something that tend to push my patience past its limits. While some events are easier than others, such as car shows over social parties, I still stray from participating in these types of gigs. For those who love them and really thrive when they're surrounded by people and chaos - I commend you!

So - last month, when I attended Cars & Colors out in Telluride, I focused my efforts more on video. Capturing footage of people enjoying the cars and the cars in motion.. well, that's a different beast. However, there are occasions where I run across vehicles that I just can't pass up. Finding a Lamborghini Countach, with its doors CLOSED and not surrounded by other cars, is one of those occasions. The location wasn't ideal for a simple shoot and edit but, with a little masking and some fine tuning, it was a decent candidate for a background swap.

As I ran through edits on my first image and tried to identify a style I wanted, I stumbled across some retro wave music I hadn't listened to in a while. That got me thinking.. what if I aimed for retro tones and a dusk vibe? While I tend to lean more toward the warm edits, this direction felt like a good fit for the Countach. 

View fullsize IMG_0628Csm.jpg
View fullsize IMG_0588-1sm.jpg
View fullsize IMG_0652-1sm.jpg
View fullsize IMG_0655-1sm.jpg
View fullsize IMG_0659-1sm.jpg
View fullsize IMG_0658-1sm.jpg

Gear: Canon 6D, Canon 24-70 2.8L, Tiffen CPL, Sunpak Tripod

Post Processing: Adobe Camera Raw & Adobe Photoshop

tags: Canon, Lamborghini, Telluride
categories: Car Spotting
Wednesday 10.17.18
Posted by James Sanny
 

Cars & Colors 2018 - The Rally

I was offered up the opportunity to head back out to Telluride again this fall to cover the Telluride Festival of Cars & Colors for the second year in a row. Though last year's trip pitted us against some rain and less than ideal outside conditions, this year promised nothing but sunshine and perfect temps. I hit up my buddy Jake, who recently picked up a Lexus SportCross, we talked out our plans, filled the sport wagon to the brim with gear, and didn't look back.

Day one of the festival kicked off with all the same activities as last year's event - a poker run, a car show on main street, and the Million Dollar Highway Road Rally. Of course, like most of these multi-day events, it's not possible to hit everything.. so I made the choice to focus on the rally this year. To be honest, the 240-mile rally was our key interest at this year's festival. Where else (in the U.S.) can you drive scenic mountain roads with some really amazing vehicles?

Since my main focus was videography this year, we spent about an hour building out a DIY camera car rig that would support my DJI Ronin. Since my primary objective was to get some great rolling footage during the rally, and to do it safely, this seemed like the best and most cost effective way to handle this. Though we encountered a few snags along the way, the overall set up worked as we'd hoped it would - and it looked pretty rad, too!

While the cars are the main draw for this event, I can't ever stop myself from taking a few landscape images along the way. This part of the country is truly one of the most incredible places you'll find. Getting to roam these roads with people you know and cars you love is kind of like a dream come true. The icing on the cake is having access to gear to help capture these moments so you can remember them and share them with others!

More photos from the event are coming soon!

View fullsize IMG_9874sm.jpg
View fullsize IMG_9880-1sm.jpg
View fullsize IMG_9883-1sm.jpg
View fullsize IMG_9889sm.jpg
View fullsize IMG_9863sm.jpg
View fullsize IMG_9951sm.jpg
View fullsize IMG_9965sm.jpg
View fullsize IMG_9969sm.jpg
View fullsize IMG_0070-1sm.jpg
View fullsize Vipersm.jpg
View fullsize IMG_9986sm.jpg
View fullsize IMG_9998sm.jpg
View fullsize IMG_0028sm.jpg
View fullsize IMG_9921sm.jpg
View fullsize IMG_0240sm.jpg
View fullsize IMG_0319-HDRsm.jpg
View fullsize IMG_0314-HDRsm.jpg
View fullsize IMG_0128sm.jpg
View fullsize IMG_0079sm.jpg
View fullsize IMG_0135bsm.jpg
View fullsize IMG_0151bsm.jpg
View fullsize IMG_0153bsm.jpg
View fullsize IMG_0146sm.jpg
View fullsize IMG_0372sm.jpg
View fullsize IMG_0442sm.jpg

Gear: Canon 6D, Canon 24-70 2.8L, Canon 70-200 2.8L IS, Tiffen CPL, Sunpak Tripod

Post Processing: Adobe Camera Raw & Adobe Photoshop

tags: Canon, Wichita, Ferrari, Dodge, Lamborghini, Ford, Audi, Pontiac
categories: Events
Thursday 10.11.18
Posted by James Sanny
 

A.P.E. Challenge: Cheap Car

I recently participated in a photography challenge posted by the Facebook group, "Automotive Photography education." In this challenge, participants were to go about the process of planning and photographing a cheap/ordinary vehicle. There had to be preproduction planning (location selection, time of day, lighting) as well as an artist's statement sharing this information. Also needed in the statement were settings and editing details. Here is what I came away with..

In an attempt to properly capture an ideal environment for today's Crossover vehicle, I decided to find a location that offered the attractive scenery of a road trip along with a family friendly event space. Working with a base model, I figured that the location should reflect a destination fitting of the owner's financial situation. Sure, they'll still go places and do things but perhaps those activities would be more budget friendly and less grandiose.

Having already planned to visit Colorado this month, I chose to do a little investigating via Google Maps. Happening across their rodeo grounds, with plenty of parking, and views along the horizon that helped sell the idea of adventure, I knew I had my spot. Coupling that with mild weather around sunset seemed like the best choice. A little texture in the sky from some clouds would help provide interest and color. The warm tones of golden hour would be ideal for creating a summer feel, selling the story, "It's OK to stay out late tonight. Tomorrow is the weekend."

I used the natural light provided by the sunset for my images. The camera (Canon 6D) was placed on a tripod, set to bracket for three exposures (-1.3, 0, +1.3), at F9 and ISO 100. I used a Canon 24-70L with a Tiffen CPL and did two turns resulting in six photos total. I shot these at approximately 50mm. I had two reasons for shooting at this focal length:

1. To reduce wide angle distortion on the vehicle.

2. To capture a wide enough image to produce a nice scene. I wanted to show an environment where the vehicle fit in without drowning it in the surrounding neighborhood or making it look like it's deep inside the mountains, off-roading.

After taking my photos, I ran them through Photoshop's Camera Raw to pull back highlights and bring up shadows a bit. I then opened all six images into Photoshop, layered and blended them manually to accentuate highlights and shadows where I wanted. My next step was color grading through a couple built in Photoshop LUT's and Gradient Maps. Once that was done, I pulled the image back into Camera Raw to crop, sharpen, and make a few small adjustments with contrast and clarity.

Unfortunately the rodeo grounds didn't have any events planned during my time in Colorado - a realization I came to once I arrived. While I wasn't able to capture the essence of the event location in use, a prime component of my plan, I do feel like the location was still a nice fit for the vehicle. That said, I should have been more prepared and come up with a contingency plan to avoid ending up in this kind of situation.

View fullsize Port-IMG_0361sm.jpg
View fullsize Port-IMG_0382sm.jpg
View fullsize Port-IMG_0385sm.jpg
View fullsize Port-IMG_0392sm.jpg
View fullsize Port-IMG_0403sm.jpg
View fullsize Port-IMG_0423sm.jpg

Gear: Canon 6D, Canon 24-70 2.8L, Tiffen CPL, Sunpak Tripod

Post Processing: Adobe Camera Raw & Adobe Photoshop

tags: Canon, Mazda, Buena Vista
categories: Photo Challenge
Friday 08.24.18
Posted by James Sanny
 

New lighting & new techniques.

Last year I started purchasing some online classes geared at automotive photography. At this point, it's the first time I've looked into education for improving my photography. While I've always been an avid researcher and learner, I've never looked into any sort of formal training. Considering the wealth of free information on the internet, it felt like a waste to pay for something I could likely find on YouTube or Google. Of course, obtaining a diagram for free isn't all that useful if you don't understand how to read it or use it.

After watching a couple classes on lighting cars, I decided it was time to consider adding some higher quality lights to my setup. For years I've been pretty happy with my Canon speedlights. They're portable, fairly powerful, and have worked for all the portrait endeavors I've been hired to shoot. That said, these small lights just can't match the light output of a studio quality strobe. They also aren't capable of bright, continuous output.

My first step was to research continuous lighting options so that I could try to improve my light painting game. While everyone involved in photography is familiar with the Wescott Ice Light, they're probably also familiar with its price tag. As someone who mainly does personal projects and very little paid automotive work, I didn't feel like spending that kind of money. After doing a little digging, I ran across the Yongnuo YN360. It was affordable, had pretty solid reviews, and there were plenty of example images of this being used in automotive work. Add to cart.

Then, just a couple months later, a friend reached out to me about his Einstein 640 strobe. He changed platforms a couple years back and just wasn't shooting much anymore. Having borrowed his strobe in the past to shoot some outdoor portraits, I knew it was capable of battling even the brightest of sunny conditions. Since I'd recently purchased a class on using a single strobe to light an entire car, this felt like fate. Sold.

View fullsize IMG_3395sm.jpg
View fullsize IMG_3375sm.jpg
View fullsize IMG_3405sm.jpg

Gear: Canon 6D, Canon 24-70 2.8L, Tiffen CPL, Yongnuo YN360, Einstein E640, Yongnuo YN622C II, Sunpak Tripod, Custom Tube Guard Light

Post Processing: Adobe Camera Raw & Adobe Photoshop

tags: Canon, Pontiac, Wichita
categories: Lighting
Monday 07.23.18
Posted by James Sanny
 

Does the gear really matter?

There was a time in my life when I felt like the camera gear was the most important aspect of taking quality images. Don't get me wrong, the right gear can definitely make the process easier but it's hardly a limitation that can't be worked around. Of course, when you're new to the game and heavily invested in tech news, reading about lower noise at higher ISO levels is the thing dreams are made of. Then one day I came to a striking revelation - my landlord, local grocery store and even my insurance guy agreed, camera gear isn't everything.

So, years later I'm using equipment that's considered outdated. Sure, it's still gear that many people would love to have at their disposal, capable of much more than anything I started with. It allows me to use some forms of current technology to make my process easier. Bottom line, I'm pretty lucky with the setup I've acquired over the last 9 years. But a thought hit me.. Knowing what I know now, and having grown in my process, could I produce quality work with consumer level equipment from back when I started? Maybe it's time to find out!

Meeting up with a friend, who fairly regularly complained about his camera being the cause of his photographic struggles, we decided to switch systems. For this challenge, we'd both photograph the same car, at the same time, using crop body cameras, identical focal length prime lenses, and a CPL filter. This was my chance to see if the argument, "It's not the gear, it's how you use it" was true. I traded out my old Canon 7D & Canon 35mm 1.4L lens for a Nikon D3100 & Nikkor 35mm 1.8 lens. What followed was frustrations, more work than I expected, and surprisingly decent results.

Aside from learning that Nikon's opinion of built in bracketing was unnecessary in their entry level DSLR cameras, and that their menu structure is so different from Canon that it makes switching systems a bit of a learning curve, I wasn't totally dissatisfied. This little setup handled most of my needs for this experiment. While it certainly didn't win any awards in the speed department, making panning shots a real beast to acquire, it was capable enough to do what needed to be done. In the end, the only real limitation I encountered was myself.

View fullsize blog-sky2.jpg
View fullsize blog-sky3.jpg
View fullsize blog-sky4.jpg
View fullsize blog-sky5.jpg
View fullsize blog-sky7.jpg
View fullsize blog-sky8.jpg

Gear: Nikon D3100, Nikkor 35mm 1.8, Amazon Basics CPL, Sunpak Tripod

Post Processing: Adobe Camera Raw & Adobe Photoshop

tags: Nikon, Saturn, Wichita
categories: Photo Challenge
Monday 06.04.18
Posted by James Sanny
 

The Wichita Chief

wichitachief2.jpg

Last weekend, as I was driving through our small but attractive downtown area, I noticed quite a variety of unique vehicles cruising around. Spring weather does seem to bring out some of the best eye candy in town. During this trip, I happened to catch an incredibly interesting looking truck out of the corner of my eye. We passed each other underneath a train bridge, making it hard to fully process what I'd just seen. Were there multiple vehicles? Perhaps it was a custom limo? I hadn't a clue but also didn't have time to turn around and investigate further.

Not too worried about it, as my neck of the woods really isn't that big, I continued home. Since I spend a decent amount of time attending local automotive events and photographing cars, I figured I'd run across it again sooner rather than later. Sure enough, I happened across the vehicle and its owner the following afternoon. Determined not to lose out again, I began the pursuit.

After paralleling the owner for a couple blocks, I was able to make my way back to him at a stoplight. Window down and all smiles, he was eating up all the honks, waves and support being fed his way. Who wouldn't? Thankfully our lights downtown are unnecessarily long and, after what felt like 10 minutes, I got his attention. With nothing but a DSLR in hand and a shrug behind the wheel, he smiled, motioned to a nearby parking lot, and it was a date.

Over the last few years I've really grown in the photos I take. I've spent a lot more time scouting locations, setting times to work with the best possible light, and networking with people to try and make bigger things happen. Of course, none of that matters when you happen across an opportunity like this and it's a last minute thing. The only thing you can do to prepare for a situation like this is to have your gear with you at all times, and know how to make the most out of a less than ideal situation.

So, making due with what I had, I snapped a few angles of this crazy looking truck, had the owner give me the rundown on what exactly it was I was looking at, and promptly zoned out during his spiel. You see, that's the thing about being hyper focused on something you love.. It's really, really hard to split your attention. Instead of coming away with some great photos and the details to share about what you're looking at, I got some random snaps in a parking lot and virtually no backstory to accompany them. I realized this truck deserved more than that so, after consulting with some other local photographers about backdrops, I dove into my old archives and dug up some scenic shots from western Kansas.

Here's what I can remember about the truck: The owner, Monty, has only recently finished the vehicle up enough to get it out on the road. When I ran across him, he was practicing driving something with such a long front end. He's actually a sculptor, which is where much of the inspiration comes from on this truck. Almost every panel is handcrafted by him. He calls it, "The Wichita Chief," and it's meant to be considered a rat rod. It's not done yet! He's got plans to add in some arrow head details along the front and a coat of clear to keep it from rusting. It's built on a truck chassis. I believe he said the cab is from an old Dodge pick up. And that's pretty much it..

View fullsize WichitaChiefsm.jpg
View fullsize WichitaChief3sm.jpg
View fullsize WichitaChief2sm.jpg
View fullsize wichitachief1.jpg

Gear: Canon 6D, Canon 24-70 2.8L, Tiffen CPL, Yongnuo YN360, Sunpak Tripod

Post Processing: Adobe Camera Raw & Adobe Photoshop

tags: Canon, Dodge, Wichita
categories: Car Spotting
Friday 05.25.18
Posted by James Sanny
 
Newer / Older

Powered by Squarespace.